This guide provides everything you need to know about a square taper crankset including
- how to remove this type of crankset
- how to use a crank arm puller
- how to (re)install the crankset
But, first of all, what is a crank? And why can’t we say “crank arm“?
Crank vs Crankset
Let’s first of all deal with the issue of crank vs crankset.
A “crank” is part of a shaft that translates energy directly from the source into the movement of components in a mechanical system.
To be fussy about definitions, the crank is actually the bent part of the shaft. It forms an angle with the rest of the shaft which for bikes is the bottom bracket spindle.
That means you don’t need to talk about crank “arm”. Crank is enough.
The same can be said about crankset: the crankset is the crank, ie. the arm, the spider on the drive side, and the chainrings which bolt onto the spider.
Crankset is a way to indicate the whole assembly comprised by these components. Spiders are limited; cranks come in more variations; most variety is with chainrings.
Crank arms come in specific lengths. 170mm, 172.5mm, and 175mm are the most common.
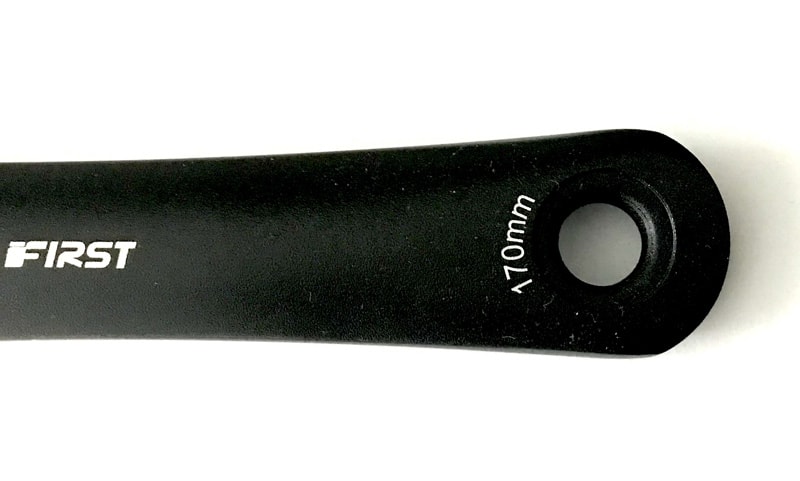
You’ll usually find the spec printed somewhere on the crank, often on the inside face opposite to this one.
The Spider allows you to swap your chainrings to achieve different gear ratios, within reason of course.
Let’s say you are running standard 53/39T chainrings on the front and swap them out for a compact, say 36/30T. You’ll need a front derailleur just for that. You’ll also need to take into consideration the rear derailleur cage size—you may need to change the derailleur as well.
You’ll also need to take the BCD (Bolt Circle Diameter) into consideration. Very important you get chainrings that will actually fit your crank.
Having said that, chainrings are available in a huge variety of combinations single, double, or triple configurations.
What’s your poison? Cross-country, gravel, time-trial, fixie chic urban cycling . . . there’s a selection of chainrings to suit.
Given the
- widening selection of chainrings, plus
- the increasingly wide variety of cassettes available nowadays
you can achieve a corresponding increasingly wide variety of gear ratios.
How do you Measure Crank Length?
The “arm” is what we are talking about here specifically. And the arm length is measured from “center” to “center”.
Now, you should be about to protest loudly right now.
Didn’t I mention above that there is no need to mention “arm” when talking about cranks since a “crank” is a crank-arm by definition?
Yeah, but the expression is so common that I’ll mention “crank arm” here and there.
Anyway, it’s sort-of necessary here.
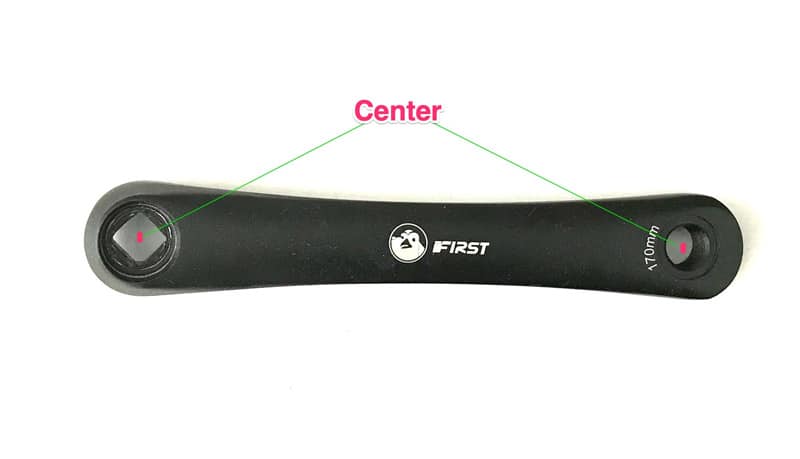
So the first “center” is the center of the bottom bracket spindle—which is the imaginary point right in the center of the aperture.
The second point is the center of the pedal spindle.
This one measures 170mm, center-to-center.
What is the Standard Crank Arm Length?
Standard is 172.5mm. Short begins with 170mm. Although depending on who you talk to, 170mm may be “standard”. Longer begins with 175mm.
The general rule has always been that the taller the rider—and the longer the leg—so too the crank should be longer.
But here’s a scientific study that says crank length doesn’t matter.
Or rather, you need to select the appropriate crank, which includes the appropriate crank length, for the specific riding context.
I won’t go on about it here. You should read it and evaluate the argument for yourself.
What is a Square Taper Crankset?
The crankset gets the square taper name from the type of bottom bracket to which the crank is mounted.
Check out our Ultimate Guide to Square Taper Bottom Brackets for more information on these.
The Ultimate Guide to Square Taper Bottom Brackets
The post gives you all you need to know about square taper bottom brackets including how to remove and install them in great detail.
Here are the key points setting the scene for our look into square taper cranksets.
Most square taper bottom brackets come in cartridge form.
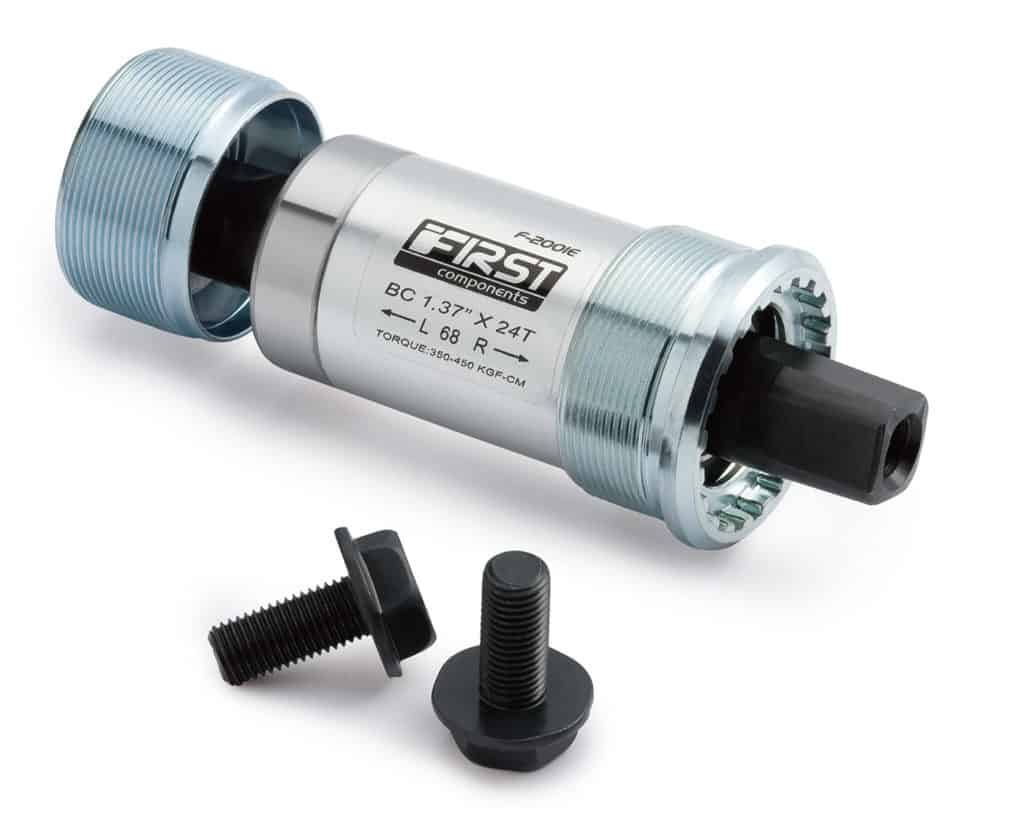
The bearings are sealed units that sit permanently inside the bottom bracket’s body. The unit is seated into matching threads inside the bottom bracket shell, then screwed into the shell.
Cartridges are both cheap and durable. When the bearings begin to fail, remove the cartridge and install a new one.
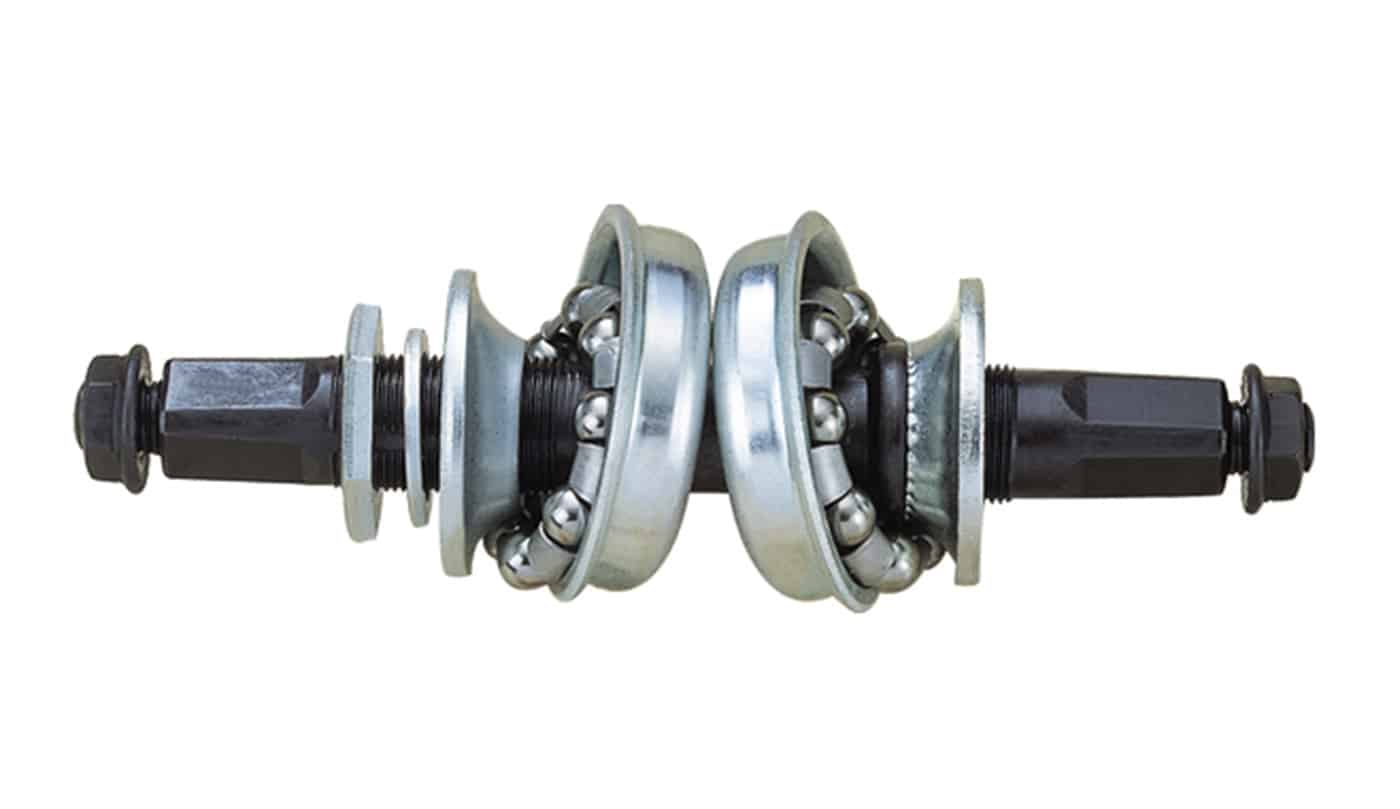
You do find square taper bottom bracket setups where the spindle rotates courtesy of a cup and cone with bearings in a race.
And yes, this is a spindle since it “spins”—an axle, on the other hand, is fixed with the bearings rotating around it.
The “square” relates to the seemingly obvious four faces that make up the square taper spindle’s end.
The end is actually an octagon since the square edges have been bevelled slightly.
Still, practically speaking you have four surfaces generally tapered at a 2° to the spindle’s centerline.
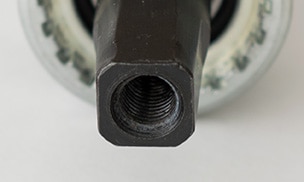
That forms a wedge in relation to the crank’s aperture surfaces which also taper outwards, narrowing towards the outside.
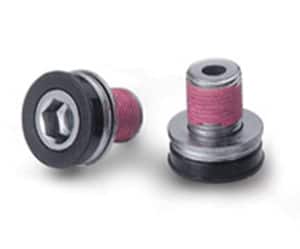
The crank is wedged into a tight connection with the tapered spindle through tightening the crank bolts.
Using a torque wrench will ensure you don’t tighten either bolt too much.
Going too far may result in stripping the spindle’s thread; you’ll be out of pocket for another BB.
Not a great expense but you’ll certainly want to avoid the rigmarole involved in removing the old and installing the new.
How to Remove a Square Taper Crankset
It is crucially important to remove your crankset correctly.
You don’t want to damage either the crank or the bottom bracket if you are looking to reuse either component.
The tools required are as follows.
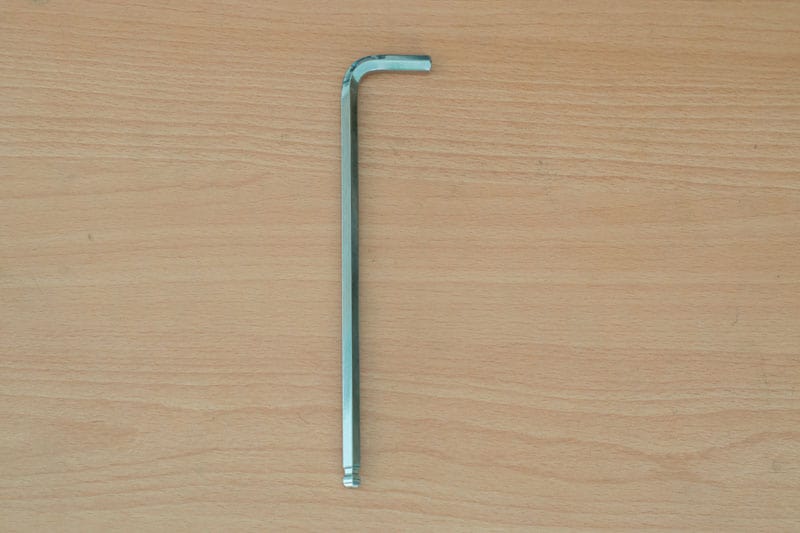
An 8mm allen wrench from your set of allen wrenches is the first.
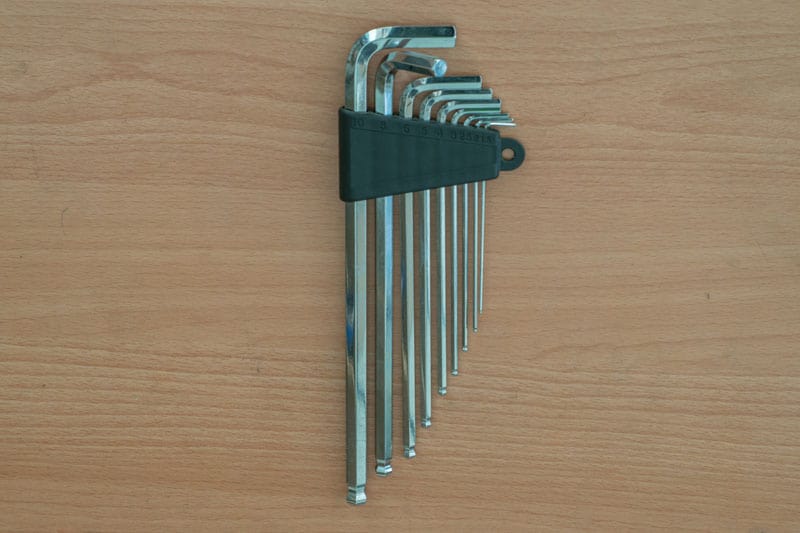
Get yourself a set of these, by the way, as you’ll need every one of them at some time.
Double up on the 4mm and 5mm wrenches since they are used the most on bikes—brakes, derailleurs, stems, handlebars, accessories . . .
For most wrenching jobs, the longer the “grip” the better. Gives you extra leverage and thus more control when breaking tight bolts free of their threads, or securely tightening bolts home.
The 8mm wrench is for removing the crank bolts. And re-fitting them later on.
You’ll need quite a lot of force to break these bolts loose. Once loose, though, they will just screw out easily. Well, as long as they were installed with grease.
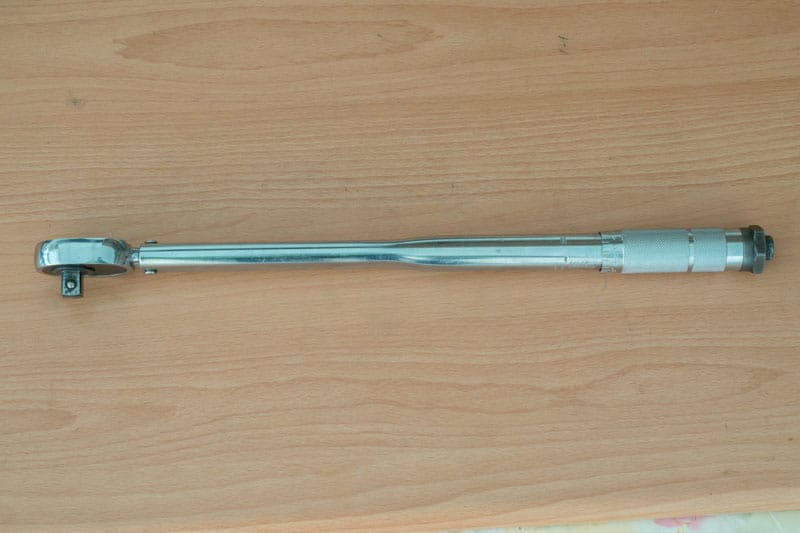
A long-handled torque wrench is really useful. You won’t go wrong having one sitting around for any heavy-duty wrenching jobs that might need doing
You’ll need to avoid overtightening, or perhaps more importantly, undertightening the crank bolts when installing the crank.
A big wrench like this makes breaking the bolts free of the spindle a lot easier. You just dial the torque setting up to 70 nM or more.
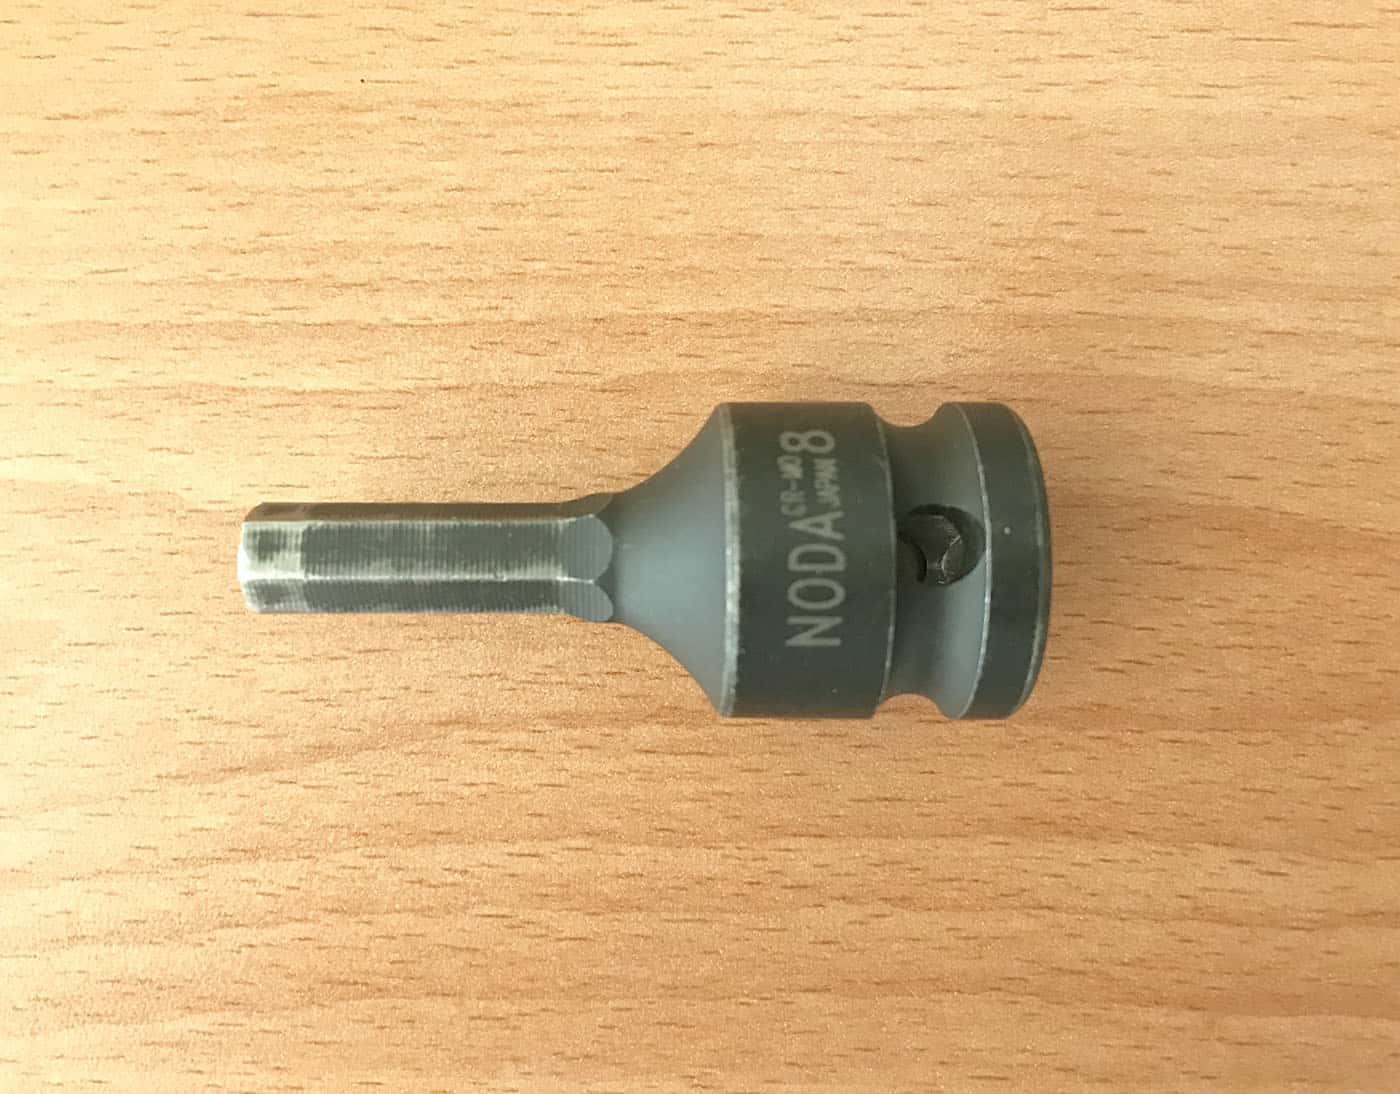
You will need an 8mm bit with a half-inch socket drive for both installing the bolts properly and removing them down the road.
Or you can use a smaller tool. Then extend the handle with a piece of pipe or something like that.
A seat post is perfect for this. Long and not so large in diameter so the angle between it and the wrench won’t be too large.
The essential tool, though, is a crank puller. What is it, how do you use it and what other tools do you need with it? Check out the next section.
You Need a Crank Arm Puller or “ISIS” Crank Puller
Why ISIS or International Splined Interface Standard?
ISIS was an “open source”, if you like, response to Shimano’s Octalink innovation. (Great discussion on the whole Octalink vs ISIS thing)
Anyway, just go find and order a crank puller online—you’ll need it.
You can get tool bundles with a crank puller plus wrenches for around seven bucks or so on Amazon. No excuse not to have one.
Ok, sure, you can remove the crank without one. But that relies on impact force and . . .
. . . Good Luck.
I think of using impact techniques in bicycle assembly or disassembly as like surgery on the human body. Surgery is invasive and only ever a last resort.
Same with bangin’ stuff on your bike. Slow consistent pressure, building slowly then releasing slowly is usually always the best approach.
Here’s a video example of the sort of thing I’m talking about. One of the better ones.
He uses a screwdriver as a wedge in between the lockring face and the crank. Tapping it has the effect of squeezing the crank away from the spindle.
Gently coaxing the crank off the spindle is much better than hammering directly into the crank at around 90° which is what others demonstrate.
A slip of the hammer, screwdriver or, heavens forbid, cold chisel (!!!) may mean a dented frame and/or a ruined crank.
He makes it look easier than it is. You really have to have the right touch and there is a learning curve involved to get that touch.
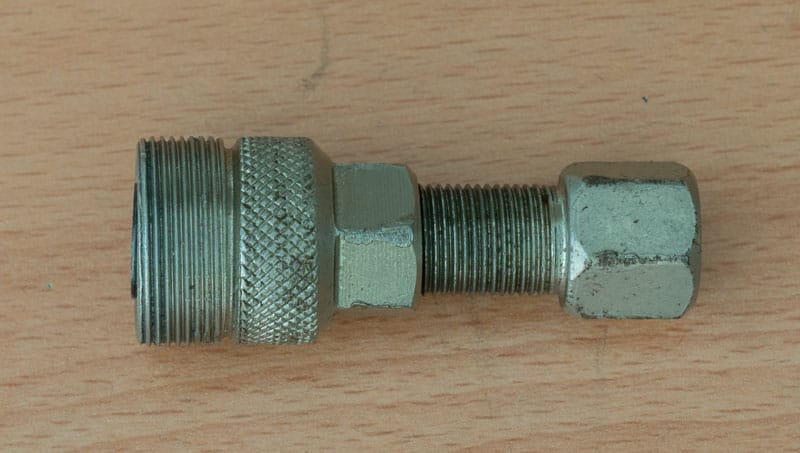
This is the doodad you’ll need . . . and even after a decade of faithful service, this one’s still good to go.
The big end on the left screws into the crank—your crank has threads cut into the spindle aperture and the puller will fit right in.
The right side bolt that screws through the crank puller’s body makes contact with the square taper spindle end.
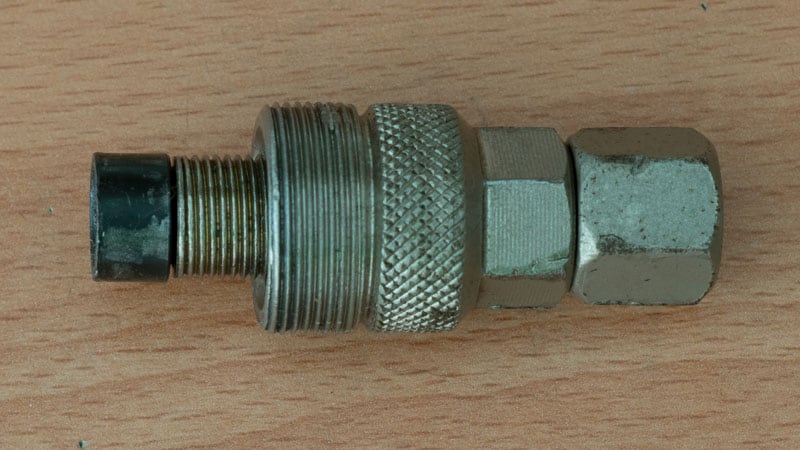
Here the foot is fully extended. You won’t need to screw it all the way in like this. But you get the idea.
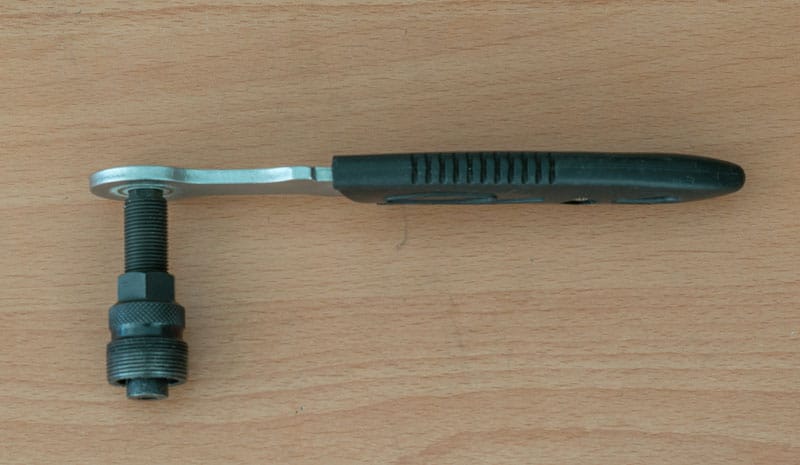
You can get crank puller’s with handles for convenience. I use one of these for that very reason.
How do you Use a Crank Puller?
Nothing much to it really.
You can see the whole process in our video on Removing and Installing a Square Taper Crank.
Or read on. We cover the whole process below.
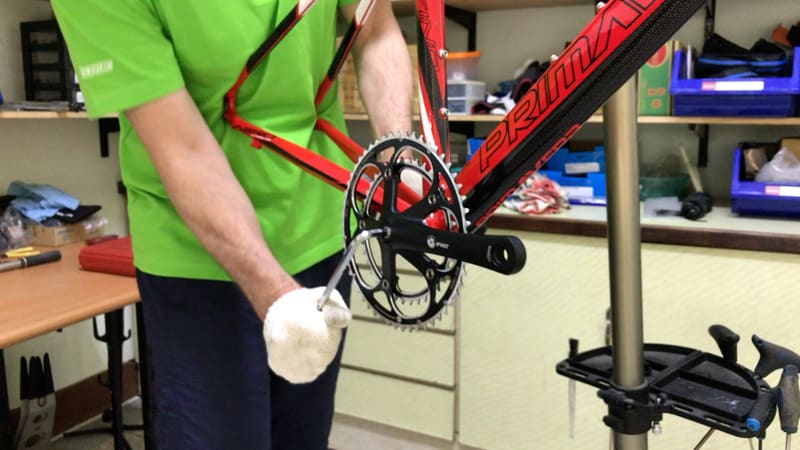
Firstly, remove the crank bolt with the 8mm wrench.
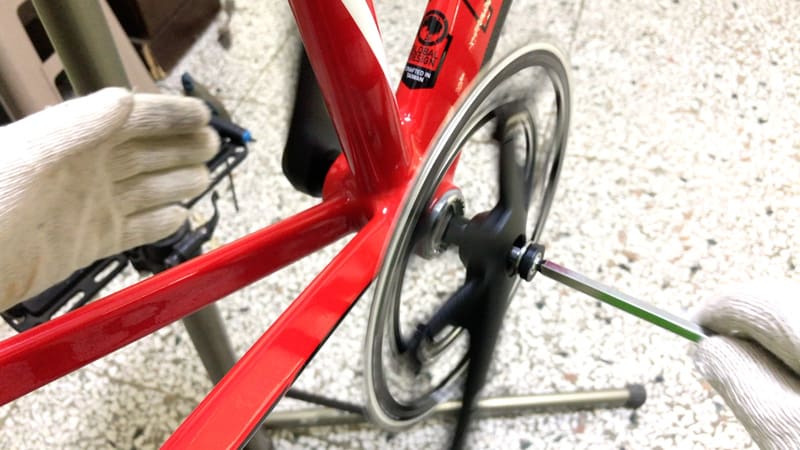
Once you’ve broken the bolt free, it will come out easily.
Turn the bolt that controls the depth of the crank puller’s foot.
Screw it out as far as it will go. Or rather, back into the crank puller’s body. Then install it into the crank.
As with any threaded tool or component that you need to always be mindful not to cross the threads.
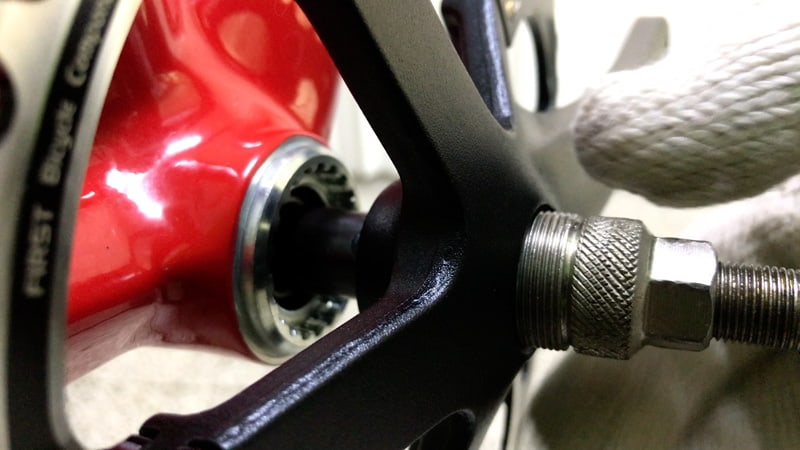
This thread is conventional right-hand thread so seat it correctly in the crank threads.
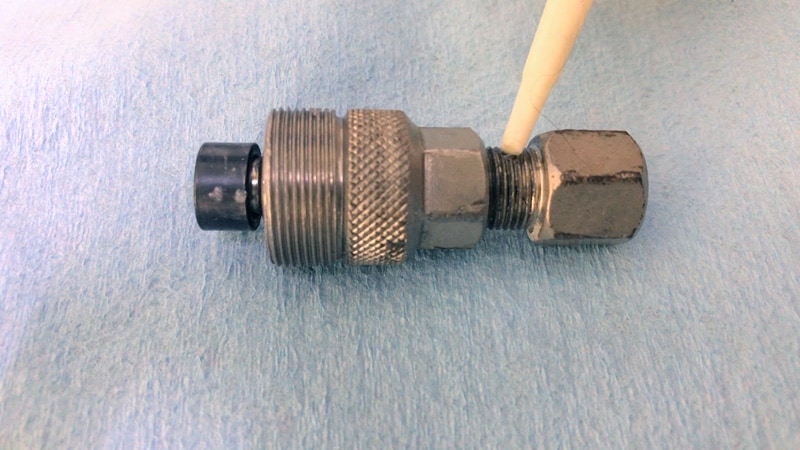
It also does not hurt to apply some light oil, sewing machine oil, that sort of thing, to the threads. Light lubrication ensures easier installation and removal, as well giving the most resistant-free experience in turning the foot bolt and pressing the crank away from the spindle.
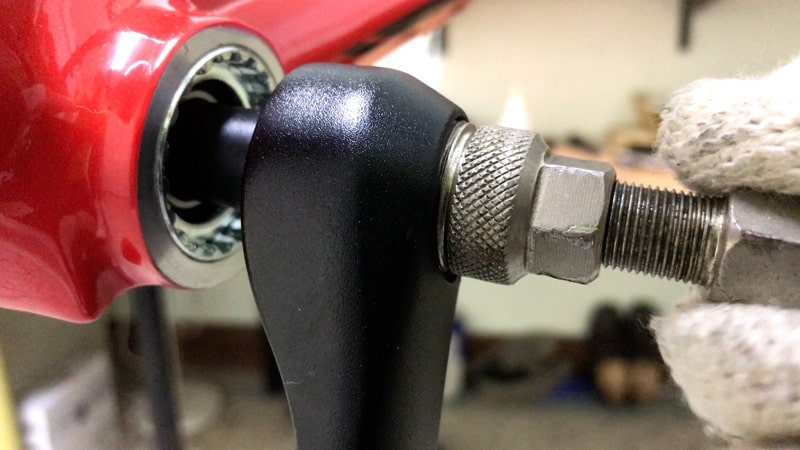
Once the crank puller is securely you will merely need to screw the foot back towards the crank until it contacts the square taper spindle’s end.
The goal is to break the crank’s grip on the square taper spindle.
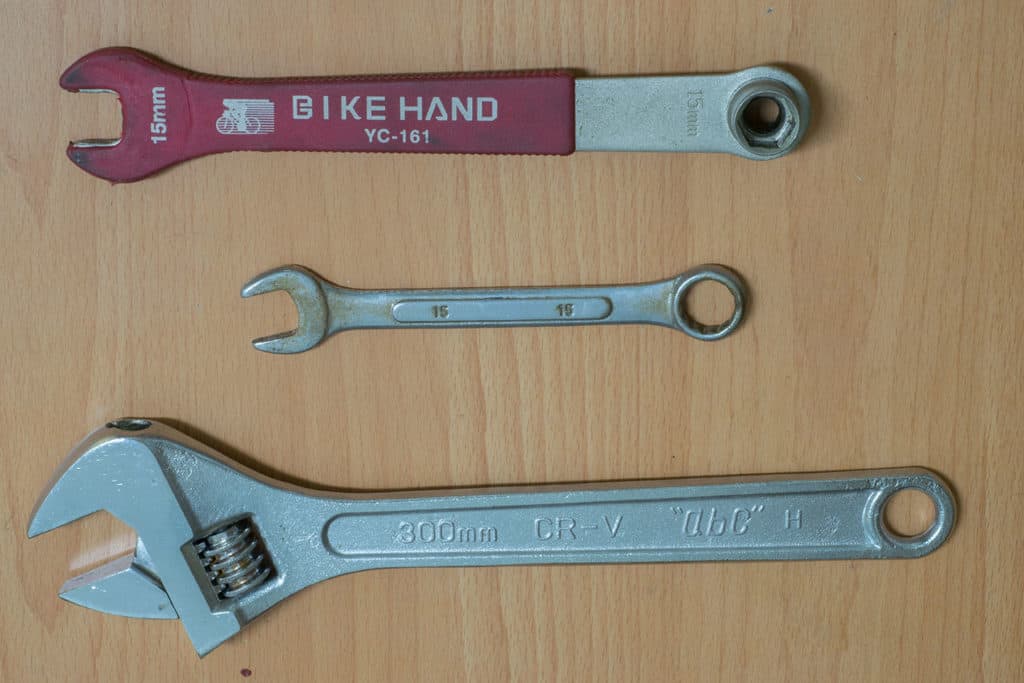
A 15mm socket wrench is the best tool to use. A socket ratchet wrench is the most convenient of course. Or ring spanner.
Basically you want to be using a tool with the longest handle possible. That way you will get the leverage required for the intial turns.
A crescent wrench will be fine also, but more likely to slip given the amount of force required at the very beginning of this procedure. Nevertheless, a big crescent wrench with a long handle will give you more leverage than alternative, shorter handled, tools.
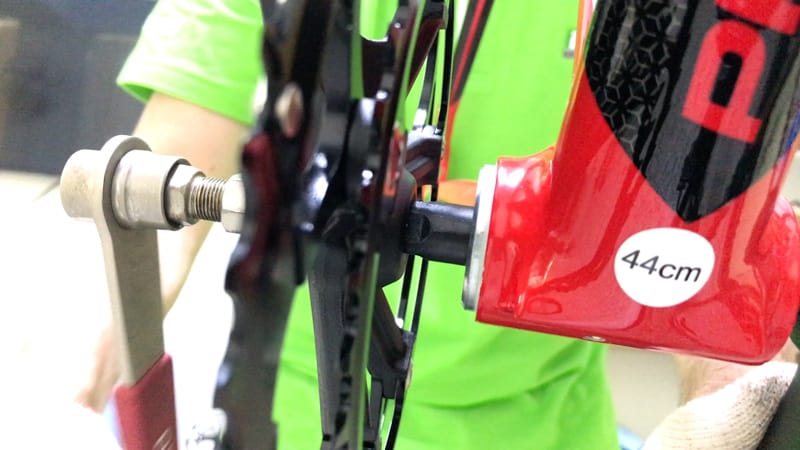
The crank will likely be fitted tightly. Breaking it free will require a lot of elbow grease for one-half to maybe one full turn.
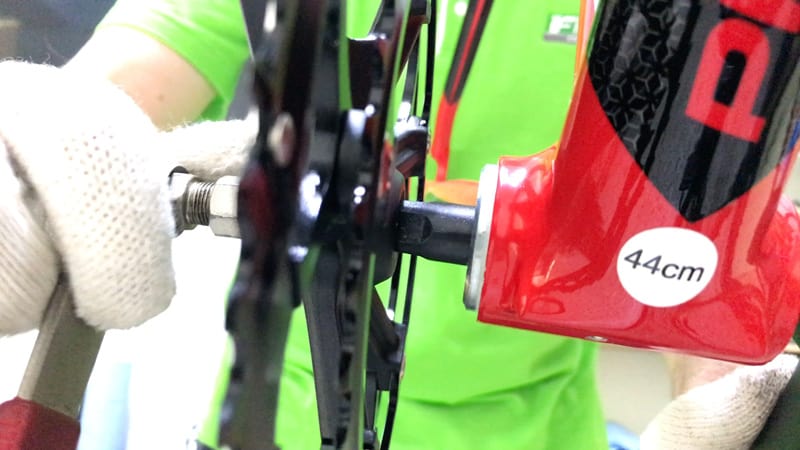
Once it breaks free, then it will come off easily and quickly.
You will probably only have to move the crank a few milimeters. Then it will come loose and slide right off.
In this shot the crank is almost right at the end of the spindle.
Make sure you are watching carefully. The crank can come free so quickly it may fall to the floor. The drive side, being heavier, is more likely to get away from you in this manner.
Once you have removed the crank simply remove the crank puller.
The non-drive side is removed in the same fashion
Now, the procedure will be hugely more complicated if the crank has rusted onto, or fused in some way with the spindle.
Not using grease in the initial installation makes it more likely to happen.
Applying grease to either the spindle taper, the crank aperture surfaces or both is a controversial topic.
However, as with all components a key reason for applying grease is to make the job of removal easier—or simply just possible—later, often many, many years later.
Check out the article to survey the various opinions on the subject.
How to Install a Square Taper Crankset?
Installing the crank on either side is straightforward.
Practically speaking, this means that the procedure is not the reverse of crank removal
How do You Fit a Square Taper Crankset?
You can start with either side.
I normally begin with the drive side. That’s a habit born of installing many more integrated cranks than square taper over the last decade.
An integrated crank’s spindle forms one piece with the crank. You install this first then finish it off by attaching and tightening the non-drive side arm.
With a square taper crank, you simply need to slot the square aperture in each to the spindle.
The important thing here is to get each square ie. 180 degrees
With a crank such as Hollowtech, for example, you can’t go wrong because the non-drive side arm will only fit on the spindle at 90° to the drive-side crank.
Not so for square taper. You can have them at 90° to each other or even 0°, facing the same way!
A friend once had his bike serviced before a big community ride which included crank removal and bottom bracket servicing.
He arrived at the event absolutely pumped and ready to go only to discover his cranks had not been re-assembled on the same plane but at 90°. No ride for him that day . . . (I never asked him how he never noticed this when he picked up the bike . . .)
Grease the Spindle?
I mentioned this earlier. Some do grease it. Many swear off it.
I won’t buy into the debate here. I’ll just say that if you do apply grease, do so sparingly. Just like lube on the chain actually. You don’t need heaps.
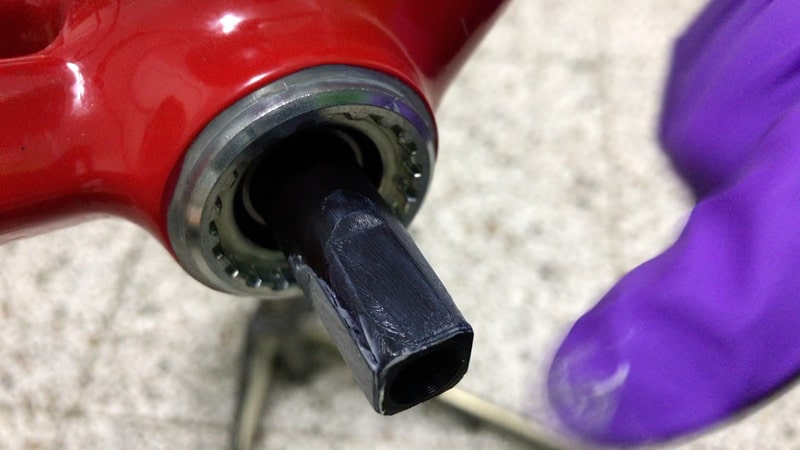
A smear on each of the tapered spindle’s four faces is quite enough.
The idea is to slot the crank onto the spindle firmly enough so you don’t have to hold it to prevent it dropping to the floor.
That’s not likely to happen. But just watch anyway. You don’t want even a slightly bent chainring tooth—there goes your new crank . . .
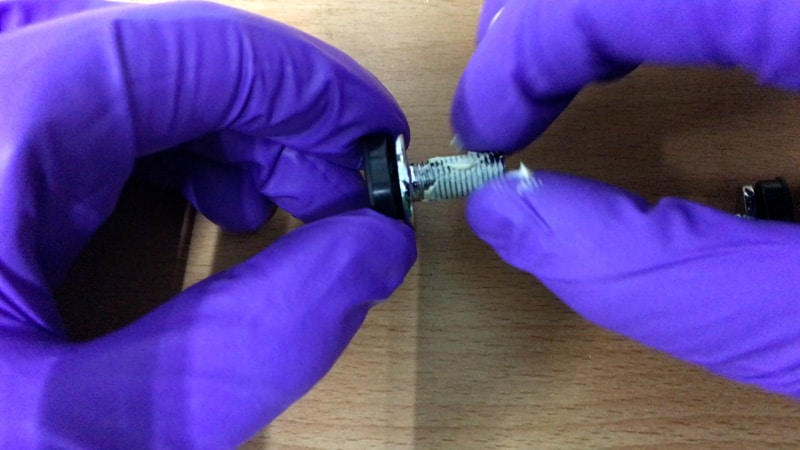
Make sure the crank bolts are greased. Grease will give a more accurate torque reading and ensure you can remove them when the time comes. And it will.
Put the bolt in place and tighten a little.
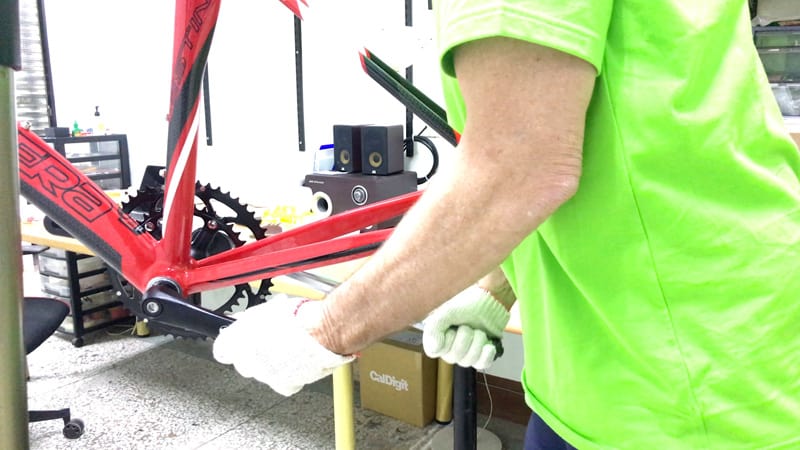
You will not be able to get it really tight because you need to grip the opposite crank when tightening to (torque) tolerance.
Do the same thing with the opposite crank being very careful to make sure that there’s a one hundred and eighty degree angle between both cranks.
What’s the Recommended Torque?
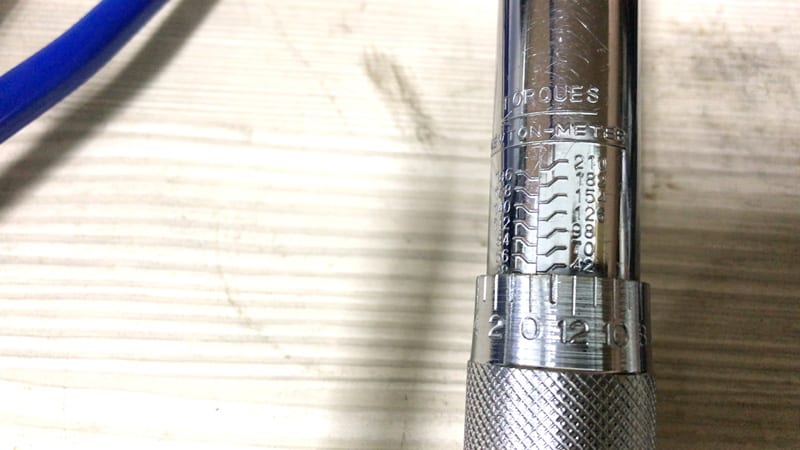
Apply a minimum of 35 nM (Newton Meters). Maxmimum 45 nM.
Even with a long-handled torque wrench, achieving 45 nM will be challenging.
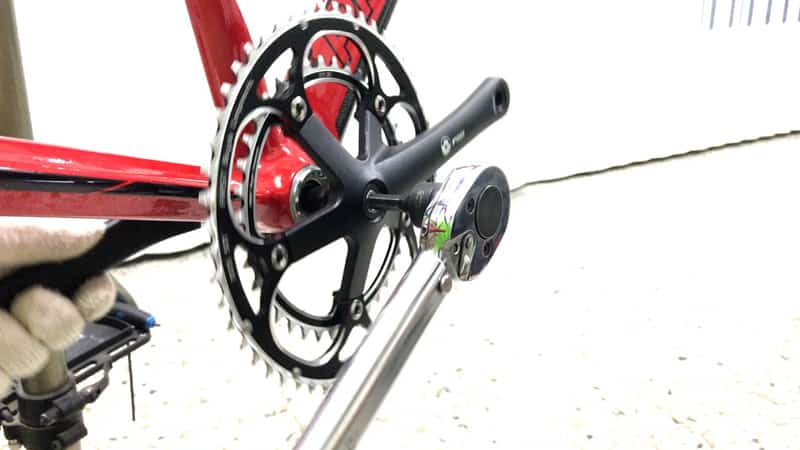
If you don’t have a torque wrench but are using a seat post as a wrench extension, the limit will be around 40 nM. The effort to get there will be intense, so you’ll know when to stop. (Won’t have a choice).
Install each crank on its spindle. Then you’ll have an anchor point for the torque wrench as you ramp up the force.
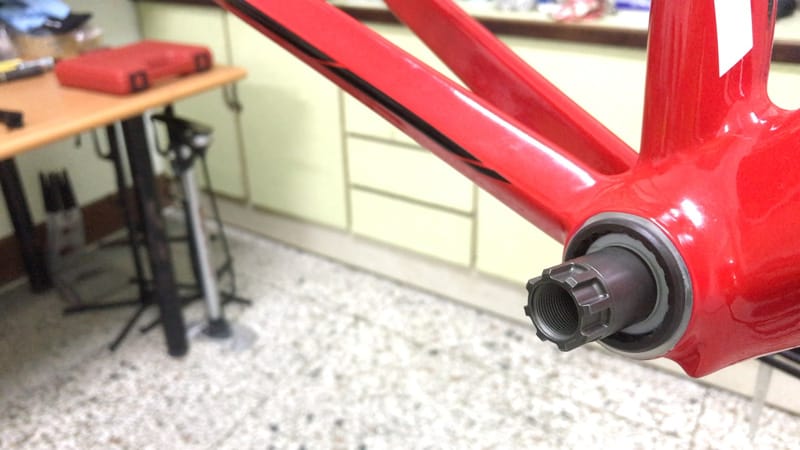
The procedure for installing a Shimano Octalink crank, is exactly the same. You just have to make sure the crank sits snugly in the splines.
Also ensure the the non-drive side crank is on the same one hundred and eighty degree plane as the drive side.
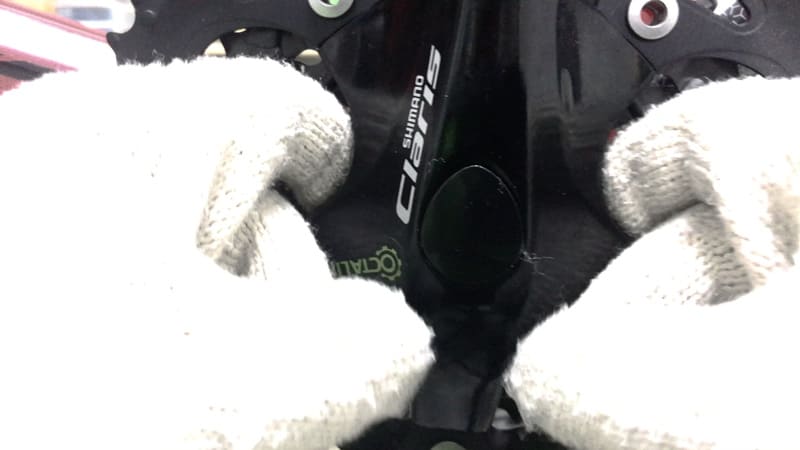
The model here is Shimano’s Claris groupset which has dustcaps covering the bolts.
These caps are resistant to sitting snugly in position when new. It will take a few goes to get it right. Once they loosen up it will be easier to seat them. They will slot right into place on an older crank
Make sure the dust cap is in exactly the position you want it to be before you press it in. If the cap is not in the right place you won’t be able to turn it.
You’ll have to remove it again. Then repeat the procedure.
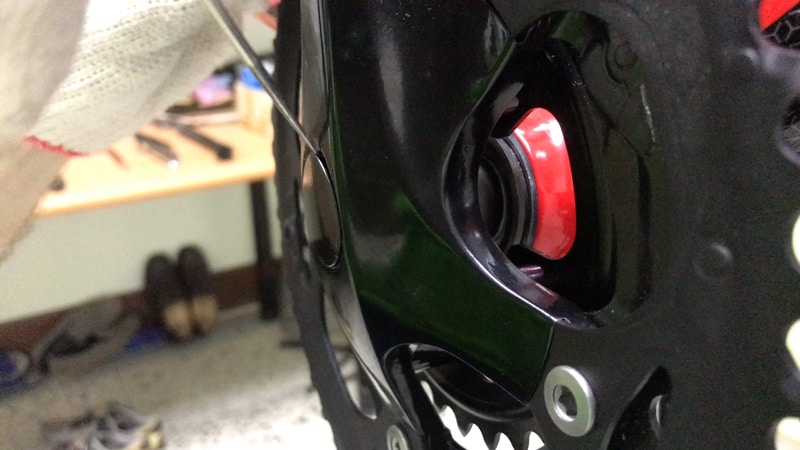
To remove simply lever the cap off with a narrow, sharp ended tool. Slip the tool under the slight gap at the top.
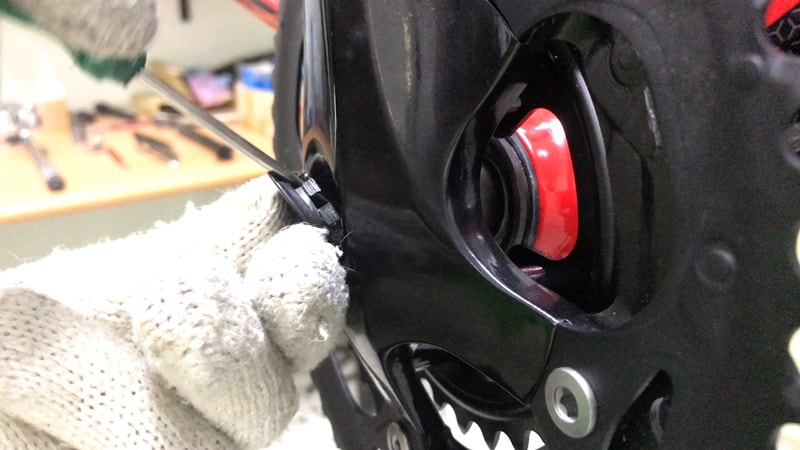
Lift the cap slightly. Then slip the tool further under. This will allow you to lever the cap completely off.
Take extra care at the start—you don’t want to scratch the crank’s clear-coated surface.
Final Comments
You can remove a square taper crankset yourself. It’s not a difficult procdeure although having done it once, the second time around will feel much more familar.
The only tricky bits are making sure the crank puller is screwed into the cranks as deep as it will go.
If the crank puller is not far enough in, it can tear out the crank threads . . . and then you’ll have to use a brute force method to remove the crank. There’ll be no getting a crank puller back in there again.
A torque wrench is really a tool you need.
You can fix your cranks tightly enough to get to your local bike shop to get them to confirm enough torque on the bolts.
So, are you going to give it go?
Have you already done so? What was your experience?
Everyone has a slightly different take on every maintenance procedure.
Any tips to share with the readers . . . ?

5 thoughts on “Square Taper Crankset: The Ultimate Guide (Includes Removal & Install)”
Having ridden and maintained cycles for 60 years (and still riding), I bought myself a torque wrench. Previously I have tightened crank bolts with the extractor/spanner tool (5″ long) just leaning all Mt weight on the spanner. With a torque wrench set to 30Nm the pressure applied seems excessive for that little aluminium crank arm. The pressure on that taper must be phenomenal! Just saying.
A 5″ lever will take a lot to get to 30Nm indeed. It’s a breeze with a large torque wrench ± 17″ handle. Usual manufacturer recommendations are 35Nm+ with SRAM one of the highest recommended maximum settings at 54Nm; Shimano 35-50Nm.
Excellent article – very informative and takes you through each step
Hi, thanks for all the info, very informative! I’m just replacing one crank as the thread for the pedals is no more. Do I need to replace with the same brand/model of crank or as long as it’s a square tapered crank of the same length, it will be ok?
Thanks
Best to do that but it probably doesn’t matter ie. if you source a used crank. A workshop might be able recut the threads into the stripped crank btw…just a thought.