A direct mount chainring is installed directly onto an integrated crank which lacks the usual 4 or 5 arm spider.
That gives you just a spindle, crank (arm) and mounted chainring.
The advent of the direct mount chainring delivered the biggest advance in crank and chainring design since the introduction of integrated cranks.
Keep reading to learn everything you need to know — including some pros and cons — about this most recent innovation in crank design.
CONTENTS
Chainring Mounting Standards
Advantages and Disadvantages of Direct Mount
Direct Mount Chainring and Crank
Direct Mount Chainring Installation
Fitting a DM Chainring to a Crank
Fitting the Crank into the BB
Chainring Mounting Standards – From Direct Mount to . . . Direct Mount?
In the beginning, the original Rover safety bike’s crank used a front “sprocket”; it was not yet called a chainring because it was one piece and not a ring of teeth bolted to the crank.
This solid sprocket was part of the crank and functionally resembled what the industry today calls “direct mount”.
The chain connected the front sprocket to the rear sprocket; rear sprockets were — and remain — a ring of teeth bolted to a mount.
A group of sprockets — the cassette — is mounted onto the cassette body these days of course. The dramatic shift was to 5 arm spiders. Older cranks still have 5 arm spiders although 4 arm spiders are now the norm.
The crucial specification is the bolt circle diameter (BCD), the measurement of the circumference of a circle connecting the center of the bolt holes on the chainring and spider arms.
You can fit any chainring you want on any spider . . . as long as the BCD is the same for both parts.
A direct mount crank gets rid of the spiders leaving you a crank (arm) and a spindle—the chainring attaches to the inside of the crank using three bolts.
Double direct mount chainrings are also a thing although not so common.

You can bolt another chainring to the direct mount chainring, creating a double chainring setup.
Advantages and Disadvantages of Direct Mount Chainrings
Lower weight and chain line optimization are two potential advantages, “potential” since every rider prefers different setups, making generalizations moot. We’ll make them all the same though . . .
Should you make the change purely in order to “upgrade” from a standard crank to direct mount?
Probably not (again, it’s a personal thing). If you break something, then that’s probably the best time to think about changing to a direct mount chainring and crank set.
THE WEIGHT ADVANTAGE
You reduce crank weight on a standard crank by removing the spider which consists of a base for the arms as well as the arms themselves.
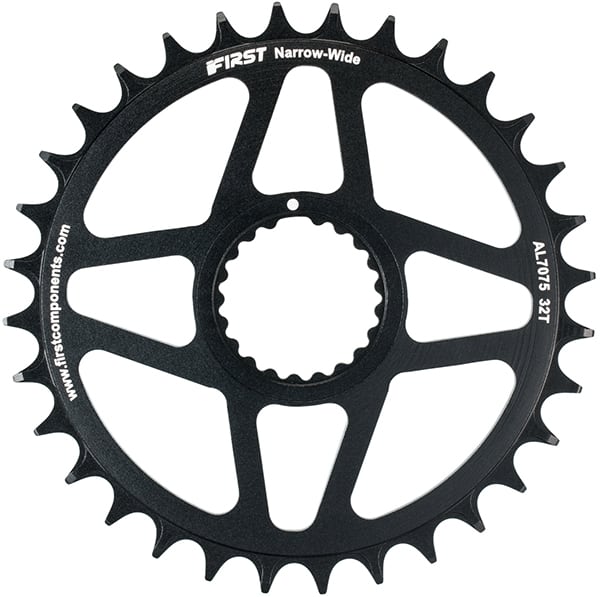
Direct mount chainrings can be very finely machined even though they do contain more material than standard chainrings.
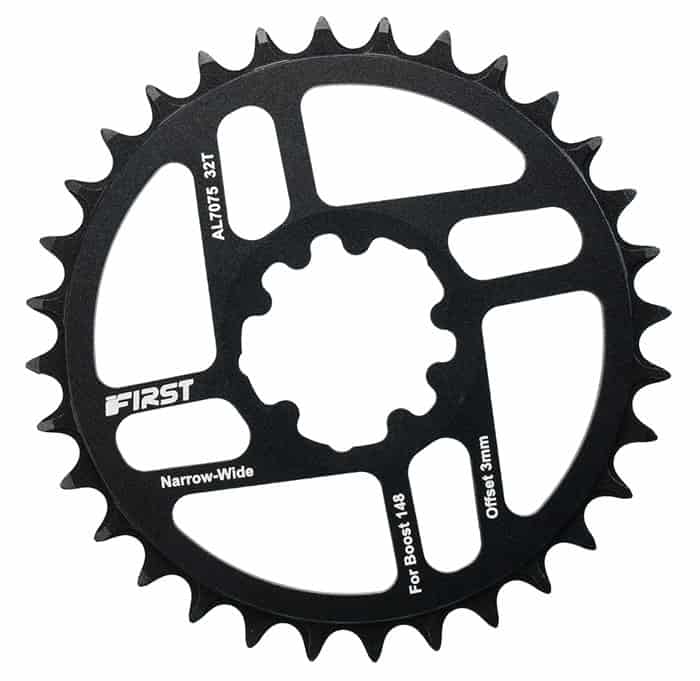
Nevertheless a finely machined mounted chainring on a finely machined crank makes for a significant weight reduction.
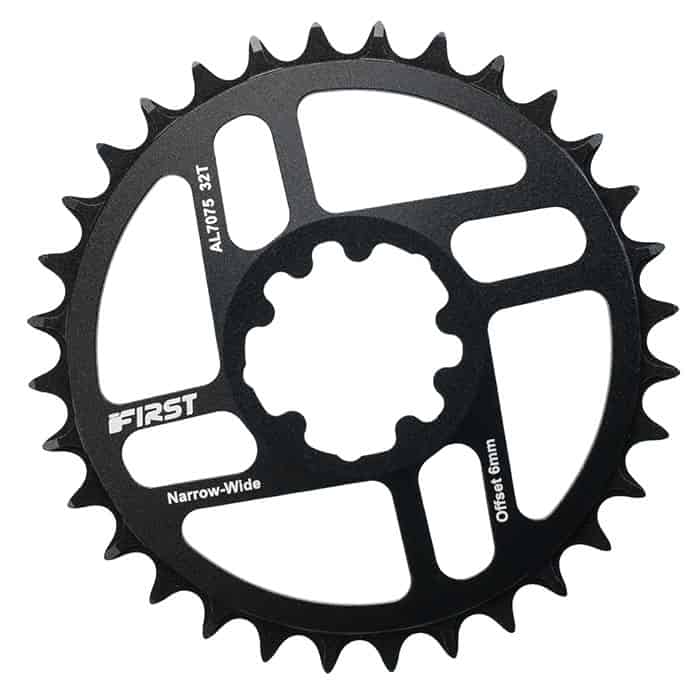
Technically, a direct mount chainring incorporates the spider in the form of the arms connecting the direct mount teeth to the ring into which the teeth are machined.
Still, that extra material is minimal in comparison with a crank and spider.
THE CHAINLINE ADVANTAGE
A 1x (narrow wide) chainring allows the precise adjustment of the chainline since the single ring occupies the place of the middle chainring in the old 3x setup.
A direct mount chainring gives you the option to run sub-28T chainrings which was not possible on a 104 BCD spider.
DISADVANTAGES
You have to remove your crank to remove and install a direct mount chainring which is not always necessarily with a standard chainring crank—remove the bolts, slide the chainring off over the crank, slide the new one to the mounts, replace the bolts.
Direct mount chainrings splines and grooves tend to be brand specific which limits you to the spec (size, offset, boost/non-boost) they offer.
Direct Mount Chainring . . . and Crank
Calling this chainring/crank design a direct mount chainring focuses attention on the chainring at the expense of the crank.
Fact is, a direct mount chainring fits to a redesigned crank that consists of just the crank arm fused to the spindle—no more spider . . . which means no more worrying about the Bolt Circle Diameter (BCD).
In the past you had to make sure the BCD of any chainring you were considering installing was the same size as the crank.
Now you just need a chainring that slots onto the mount on the crank.
That restricts you, of course, to chainrings that actually are compatible to the crank you’re using.
As long as that brand has the size you want (in the absence of cross-brand compatibility) you’ll be in business.
Direct Mount Chainring Installation
We released our first direct mount crank in March, 2022, although we’ve had several direct mount chainring models on the market for years.
The direct mount installation procedure here details changing a standard integrated crank with a 4 arm spider to the FIRST Components direct mount crank.
It’s all in the video if you would prefer to watch.
Or read on for more details and further insight into the process of direct mount chainrings.
FITTING THE DIRECT MOUNT CHAINRING TO THE CRANK
The demo MTB is a basic carbon hard tail with a 1x narrow wide chainring.
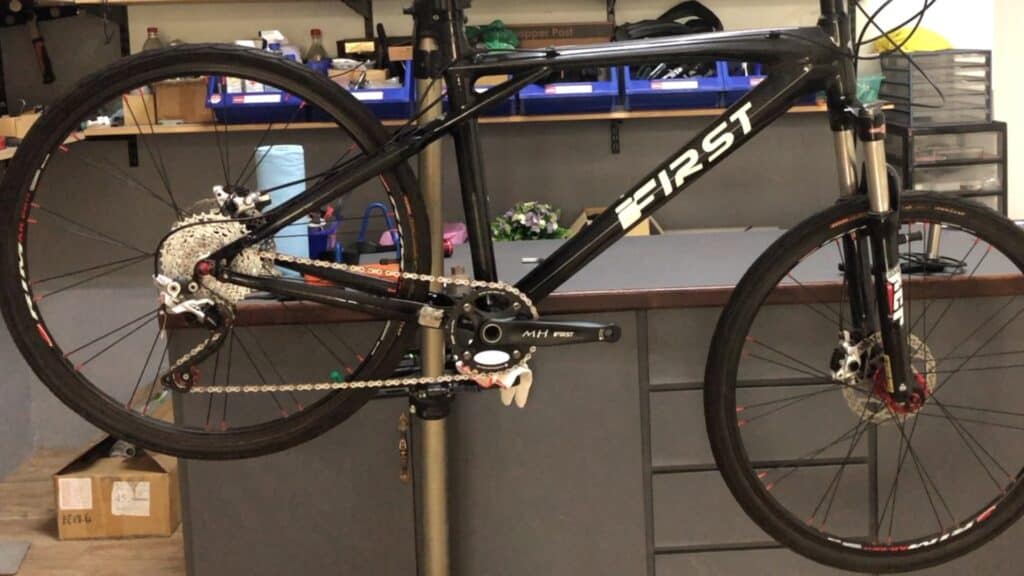
(We demonstrated the original upgrade from a 2x crankset in the post on narrow wide chainrings . . . removed the derailleur, installed a new bottom bracket, then installed the 1x narrow wide chainring crank).
A direct mount chainring set and crank is simple enough:
- integrated spindle fused to the crank(arm)
- chainring
- non-drive side crank (pinch bolts & cap).
This set has — at the moment — a choice of a 32T or 34T chainring.
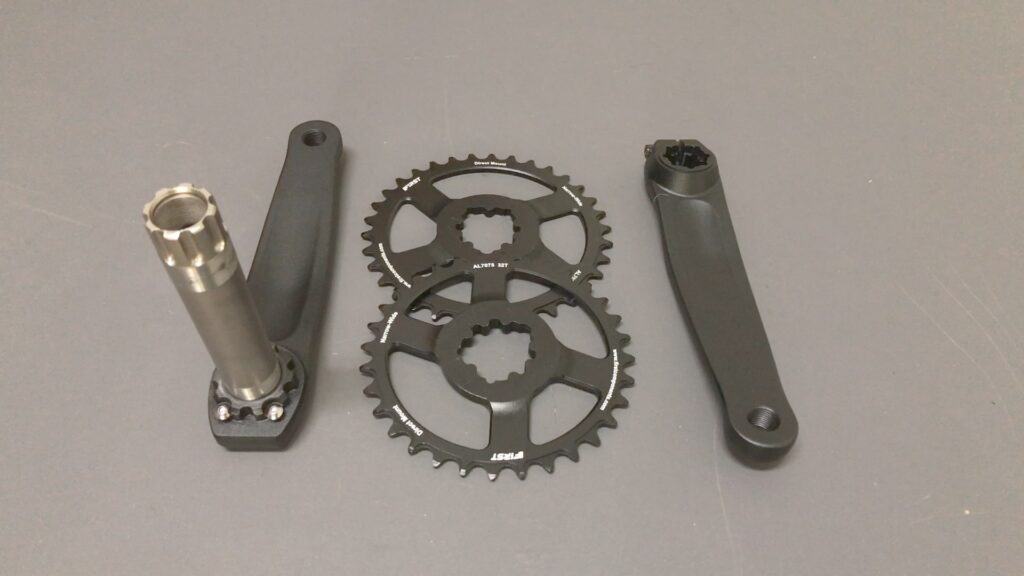
Direct mount cranks fit snugly onto their mount—so snugly that three bolts are all you need to anchor the chainring to the mount.
Even if you failed to tighten the bolts properly, the chainring is still tightly slotted into the crank ensuring zero movement.
Because this crank is about to be fitted with its chainring for the first time, the bolts need to come out first.
If you were changing a chainring, you would remove the bolts, slide the chainring off, then complete the procedure as follows.
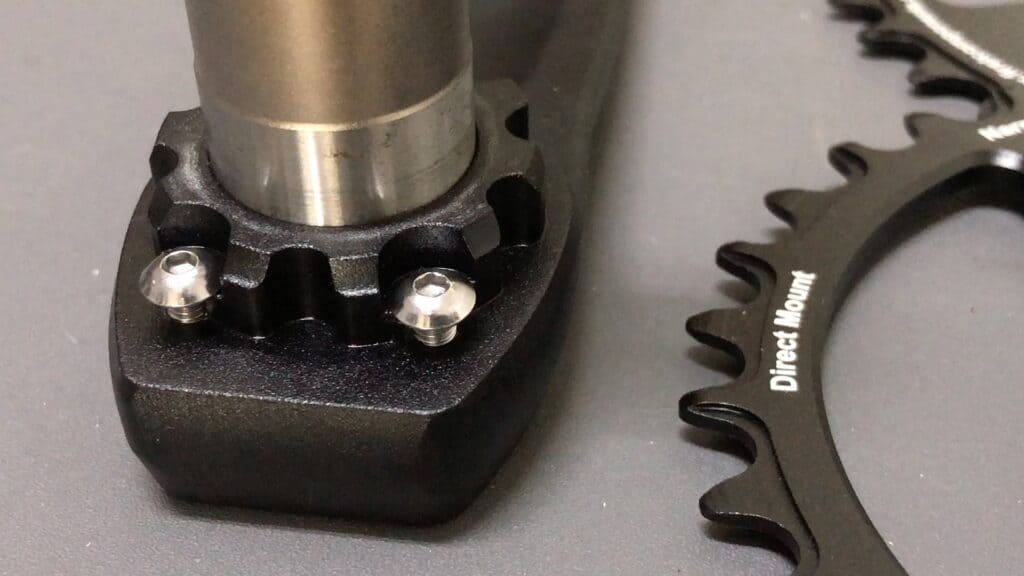
The key task is to square the chainring mounting teeth with those on the crank.
Placement must be precise due to the tight fit . . . and a tight fit ensures no play and thus premature wear.
The machining tolerances are super stringent in order to produce that fit—our chainring machining is performed by our long-time partner in a small workshop specializing in chainrings and cranks.
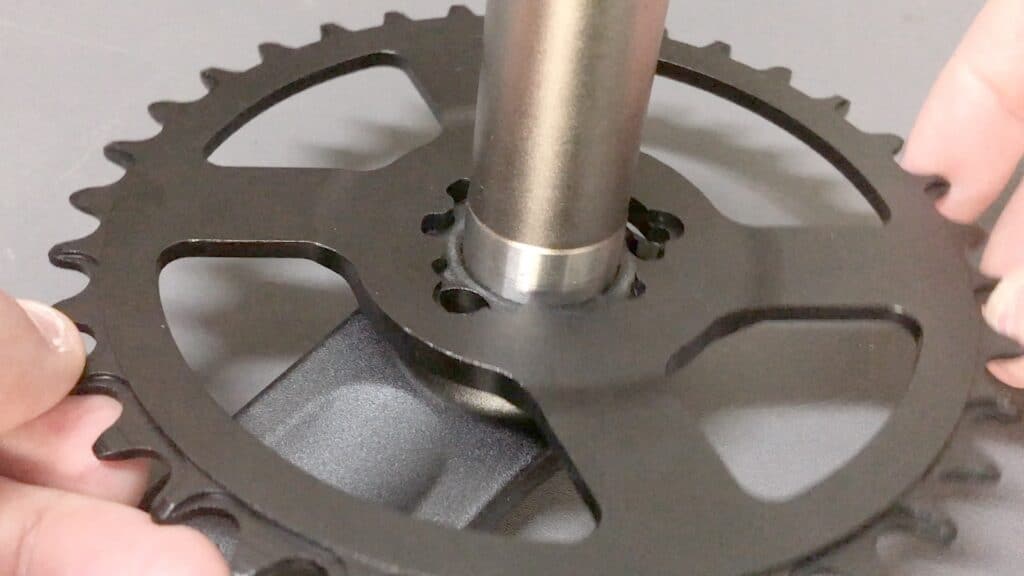
The easy installation trick is to slide the chainring directly down onto the mount.
Place the chainring against the mount, then rock it from side to side slightly so as to align the teeth to more easily square it on the mount.
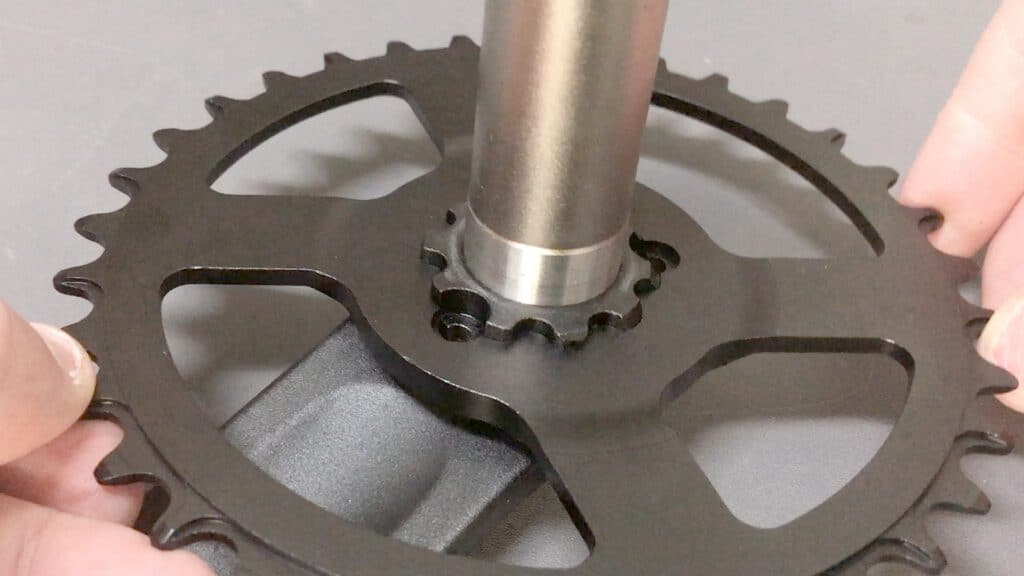
And ensuring the chainring bolt holes are aligned with the crank mount holes is also crucial. Double check that the bolt holes are aligned.
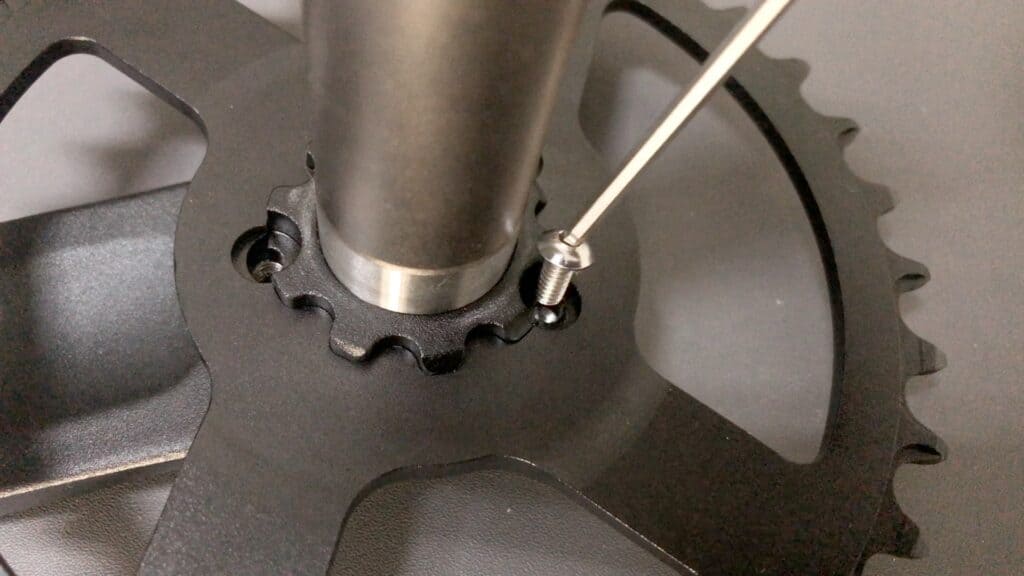
As with most bolts on a bike, pre-load each until finger tight.
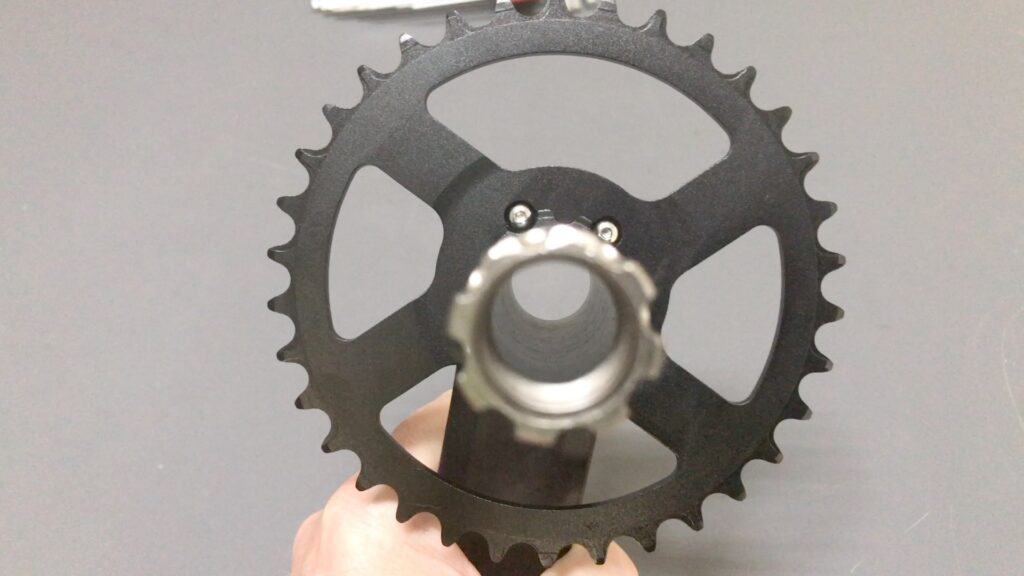
With each bolt in position, tighten each in turn with a 2.5mm Allen wrench.
Firmly tight, or around 4 Nm if you use a small torque wrench will do the job.
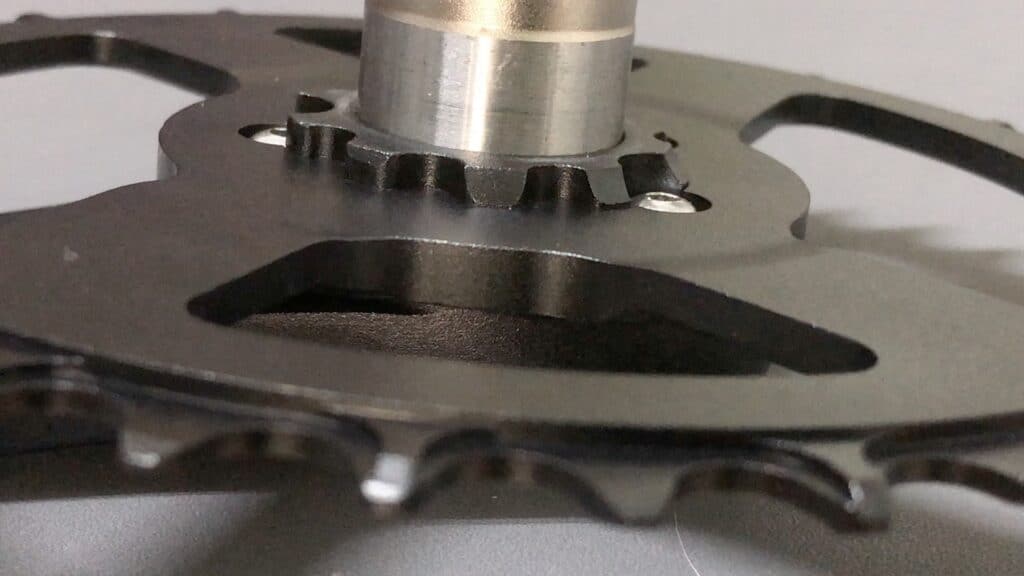
That’s the view from the side: the chainring sits perfectly square on the mount with the bolts recessed, flush with the surface of the chainring.
THE DIRECT MOUNT CRANK INSTALLATION
The first task is removing the standard 1x crank.
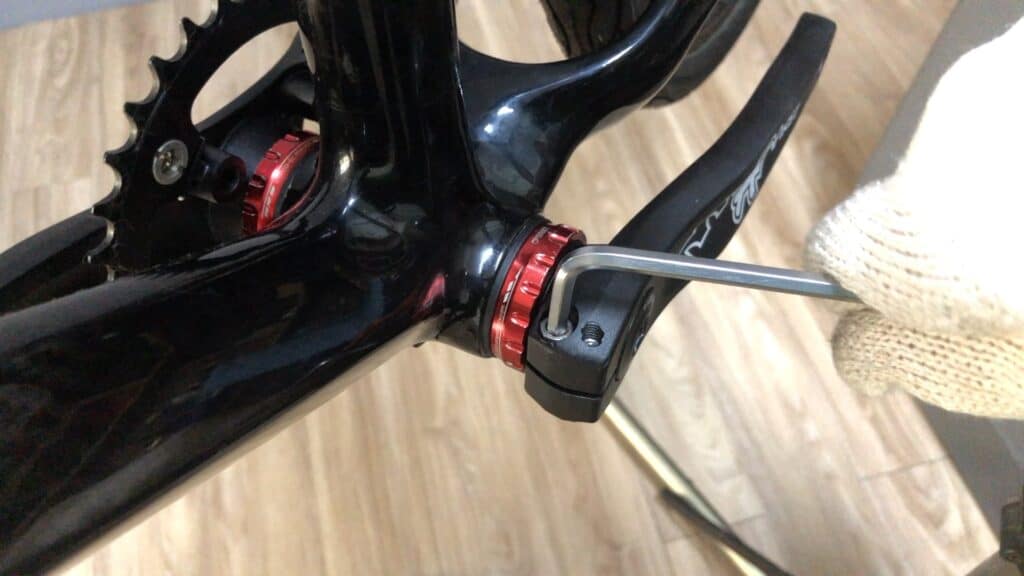
A few turns of a 5mm Allen wrench one side at a time loosens each pinch bolt.
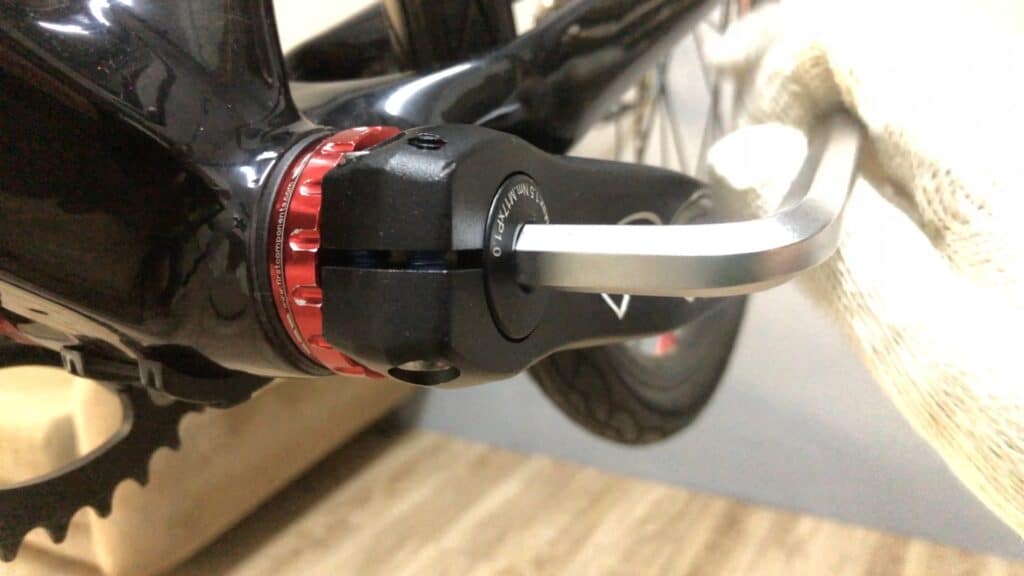
Then you’re good to remove the crank cap . . . that takes a 10mm Allen wrench on a FIRST Components crank.
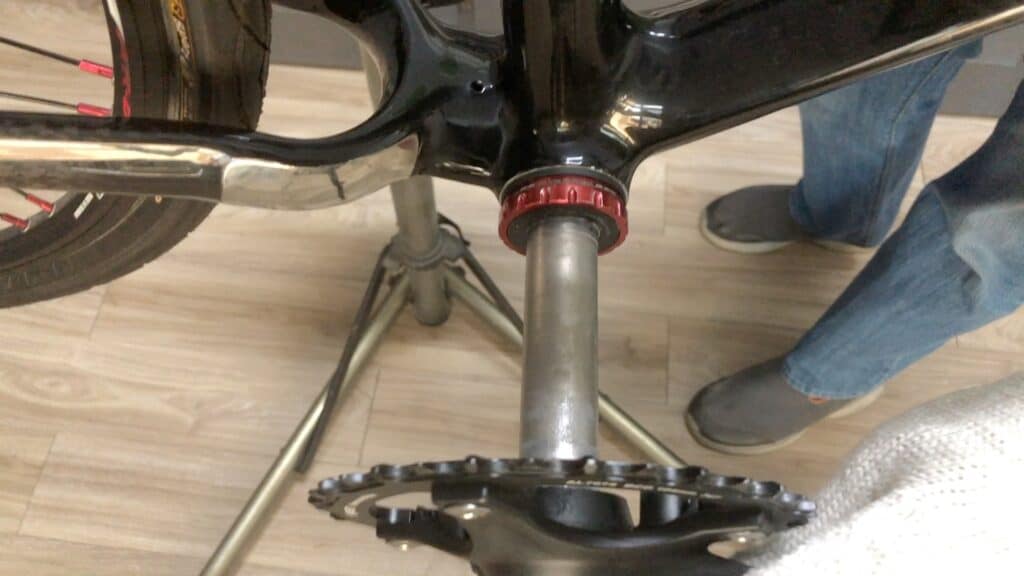
The non-drive side cranks slips off once the cap is removed allowing easy removal of the drive side crank—grease the spindle on the direct mount crank, slide it in, slide on the non-drive side crank, then secure the cap.
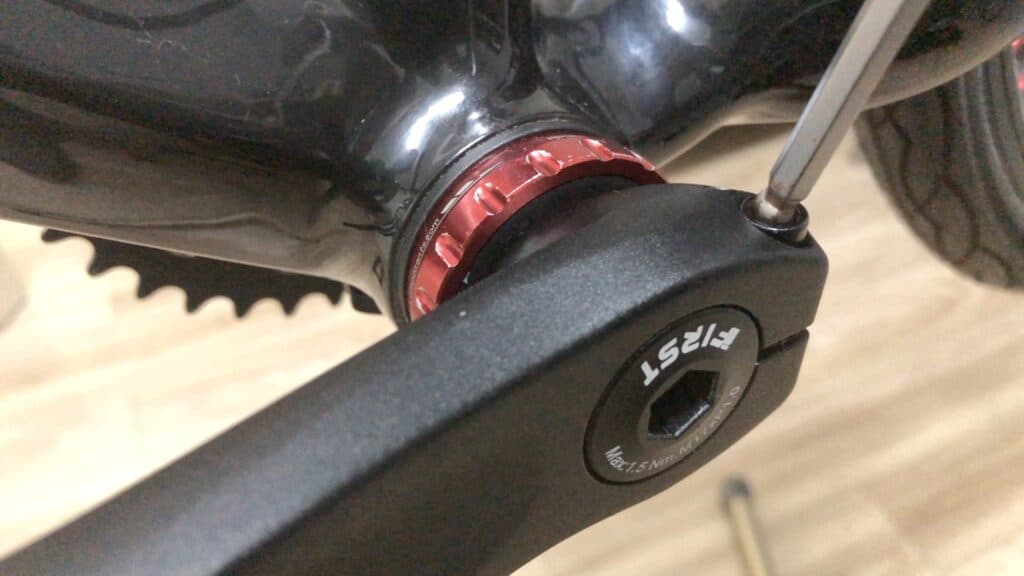
That leaves tightening the pinch bolts each a little in turn until they resist.
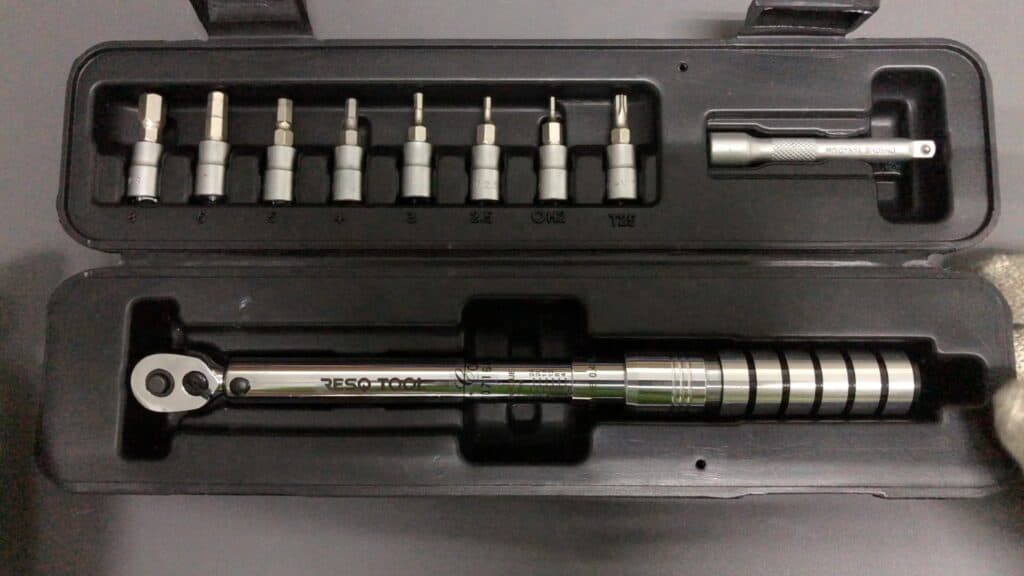
Then you’ll need your torque wrench.
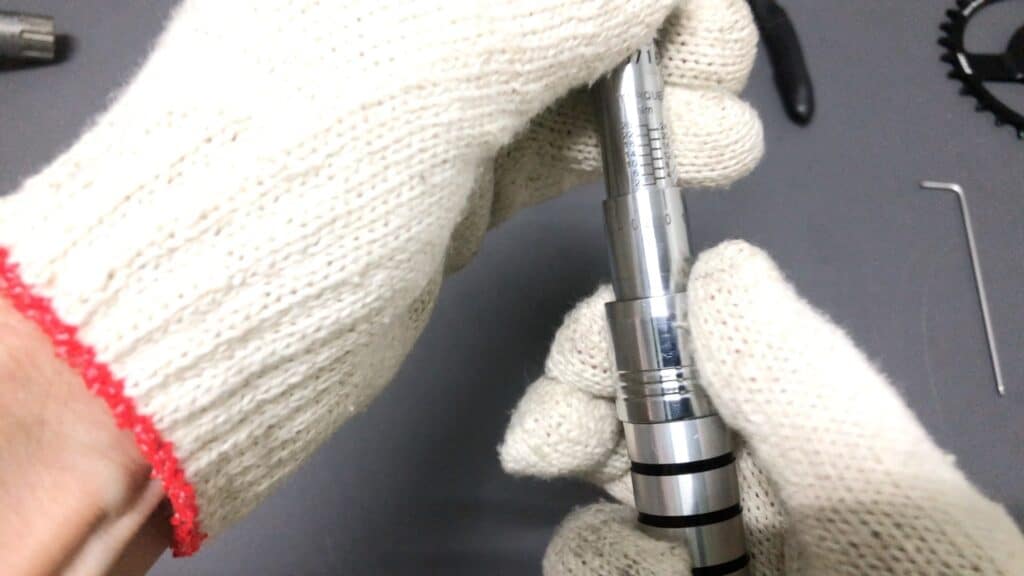
A “snap lock” type like this is easy to adjust . . . AND easy to lock so that the setting does not change as you are tightening a bolt.
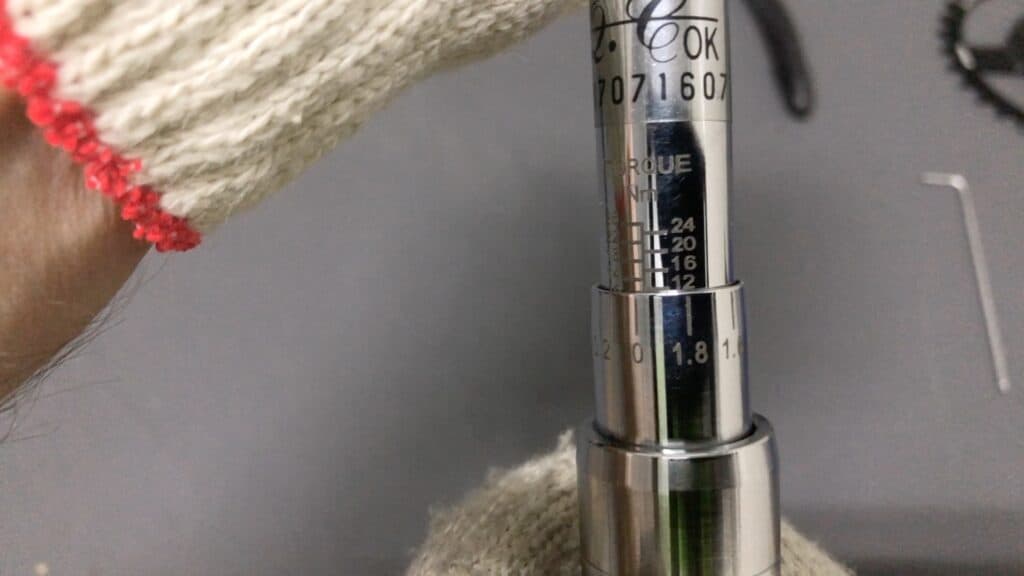
Almost zeroed in on 12 Nm—once the incremental scale hits zero, you allow the spring-loaded bevel to slide up, locking on 12 Nm . . . 12-14 Nm is the recommended lower and upper limits for most pinch bolt cranks.
Turn each of the pinch bolts a little in succession until tolerance is reached.
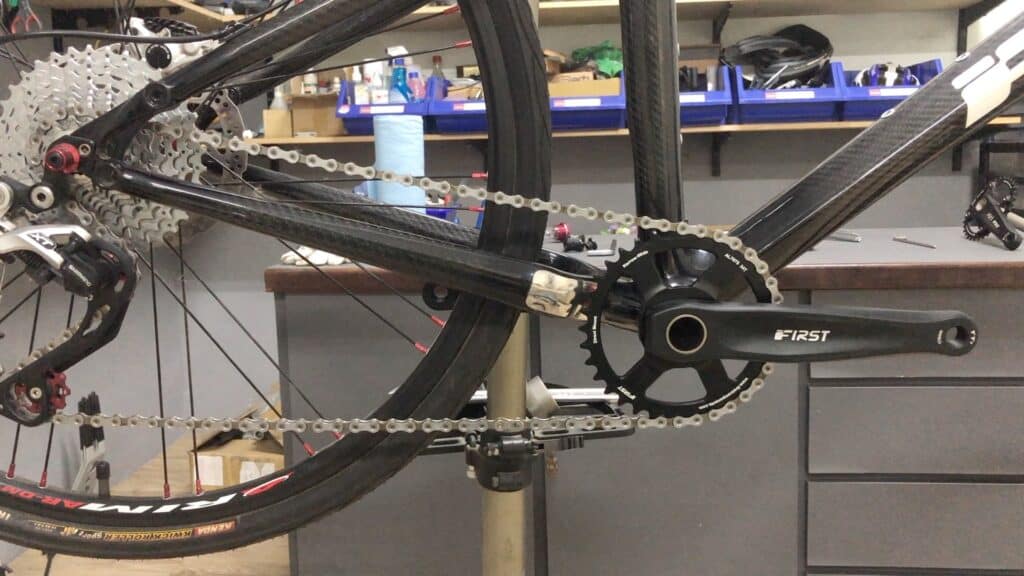
And that completes the install.
Conclusions – The Direct Mount Alternative
For riders who are very attentive to their equipment and looking to maximize performance, installing a direct mount chainring may give them the edge they’re looking for.
But for most: if it’s not broke, don’t fix it.
As you have seen, swapping a standard 1x crank and chainring setup for a direct mount chainring crank is easy (with the right tools).
Changing to a direct mount crank may be the right way to go if weight issues or other personalized performance concerns are top of mind.
Otherwise it’s probably a nice-to-have more than a must-have.

2 thoughts on “Direct Mount Chainring and Crank”
thank you for the article
So if weight can be one of the reasons to change, what weight savings are achieved here? If any, visually previous chainring, as well as cranks, look lighter.