Are you
- in the market for an MTB crankset and/or
- looking to simply deepen your knowledge of MTB cranksets?
This overview provides both a broad and detailed view of the key issues.
Links to Sections
MTB Crankset Development Through Time
MTB Crank Manufacturing
What is the Best Crankset for a Mountainbike?
The eMTB Effect on Cranksets
Are Carbon Cranks Worth It?
HOW IS AN (MTB) CRANKSET STRUCTURED?
An MTB crankset consists of
- two crank arms
- a spider and
- one to three chainrings
Let’s unpack what each is in terms of what it does. (No mention of bearings: I deal with them in the post on crankset bearings)
Although most cranksets (road bike, BMX etc.) have the same elements, MTB cranksets differ in several ways.
Crank Arm vs Crank
First, no need to talk about a crank arm since the arm is the crank, i.e. the lever upon which force is exerted. Crank is an automotive metaphor describing how an engine’s crankshaft channels energy to a car’s driveshaft.
The drive side crank includes a 4- or 5-arm connector we refer to as the spider_to which the chainring(s) attach. Probably _leg is a better word but arm is conventional.
The non-drive side crank consists of a single shaft that bolts into, or clamps around, a bottom bracket spindle or (integrated) crank spindle.
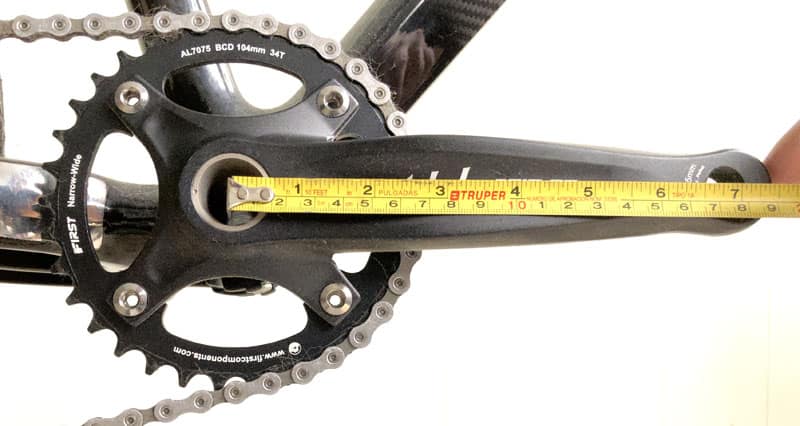
We measure the crank length “center to center”: from the center of the spindle’s hollow point, marking the center of the (here 4-arm) spider, to the center of the pedal threads.
Most MTB crank lengths are printed on the section encircling the pedal threads. You’ll see 72.5 peeking above the tape measure in the image. Going by the tape measure, we see the crank is 175.2mm in length.
Crank and Spider
Whilst bottom brackets are a separate category of component, the type of bottom bracket you use largely determines what crank you use, although bottom bracket converters give you flexibility in choosing crank/spindle combinations these days.
An under-appreciated aspect of crankset design is the influence on them of attempts to come up with quick and efficient ways to change the load ie. change the gears.
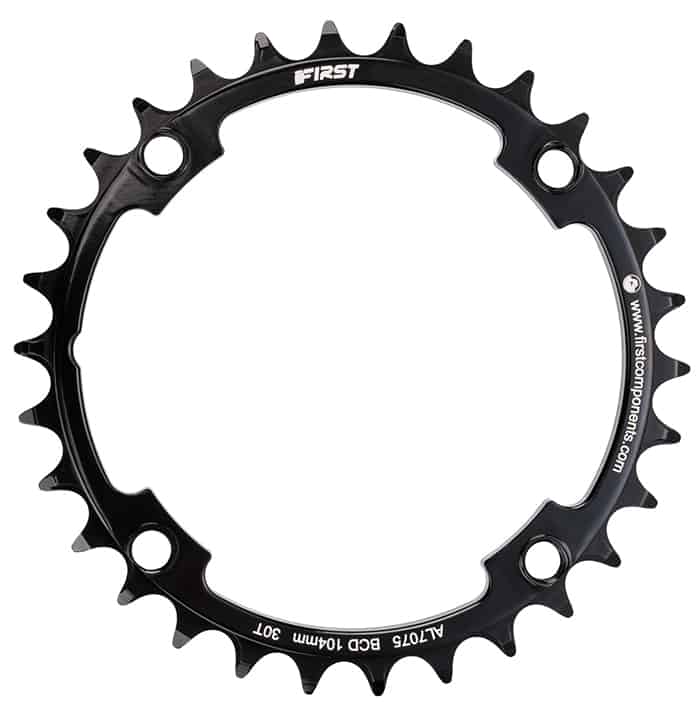
KETTENBLÄTTER are a separate category of component, but play a central role in increasing or reducing crank load.
Similarly, you can write the history of the derailleur by just sticking to derailleurs. But their development has always, ultimately, unfolded in relation to the unstated quest to improve crank efficiency.
BCD and Spider
The BCD , or Bolt Circle Diameter, is printed on the chainring. The Bolt Circle is an imaginary circle connecting the 4 bolts of the 4-bolt spider chainring in the example above. The line directly connecting one bolt with its opposite, is that circle’s diameter, the BCD.
The structure depends on the number of chainrings to be mounted.
A simple MTB crankset such as a single or 1x drivetrain has a simple mount. The chainring bolts (bolt and matching nut) to the inside edge of each spider arm.
A double chainring crank spider has an extra machined edge beneath the outer, or large, chainring where the second, smaller chainring is mounted.
The large chainring bolts to the outer side; the small chainring to the other.
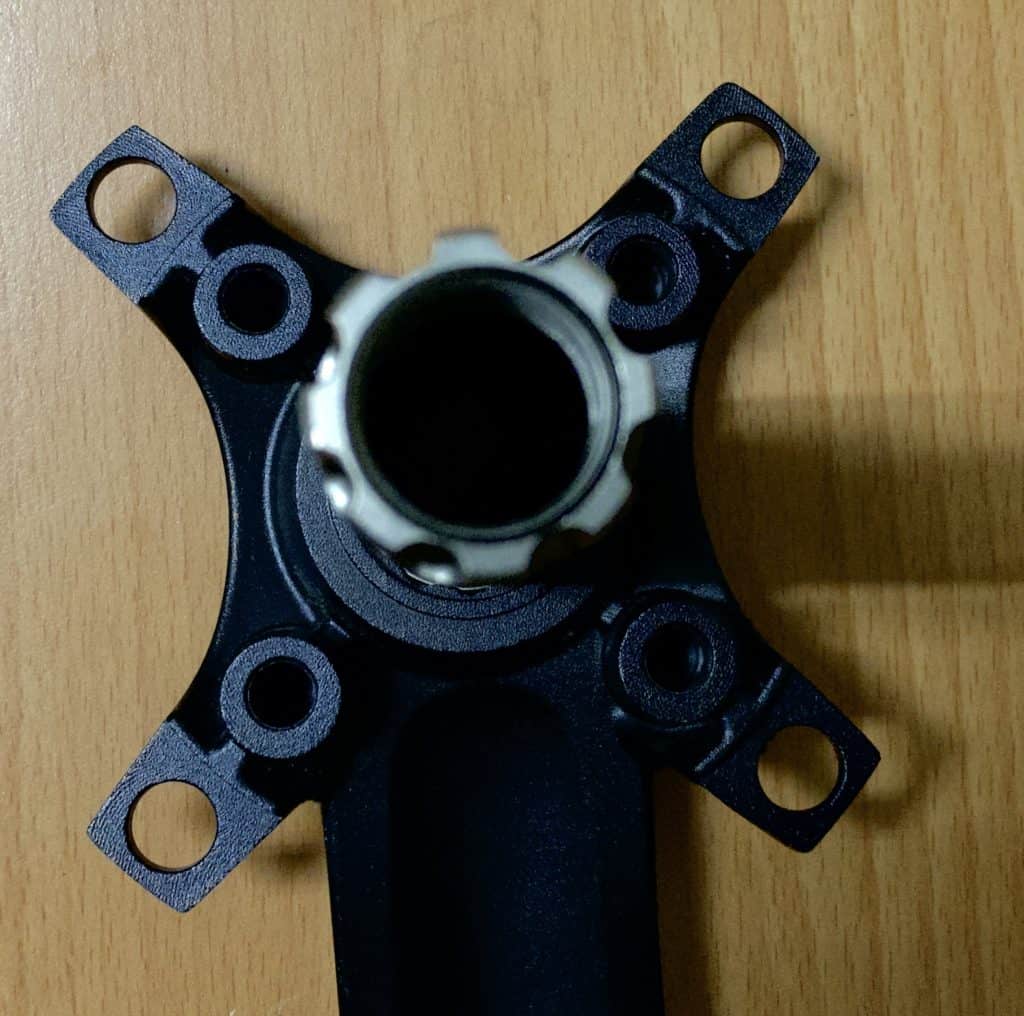
The most complex mount is the triple crank. The smallest chainring—or “granny” ring—bolts to an extra platform added to the inside of the second chainring, which then becomes the middle chainring.
The image shows the granny-ring bolt mounts snugged up next to the spindle, with the middle and large chainring mounts extending further out.
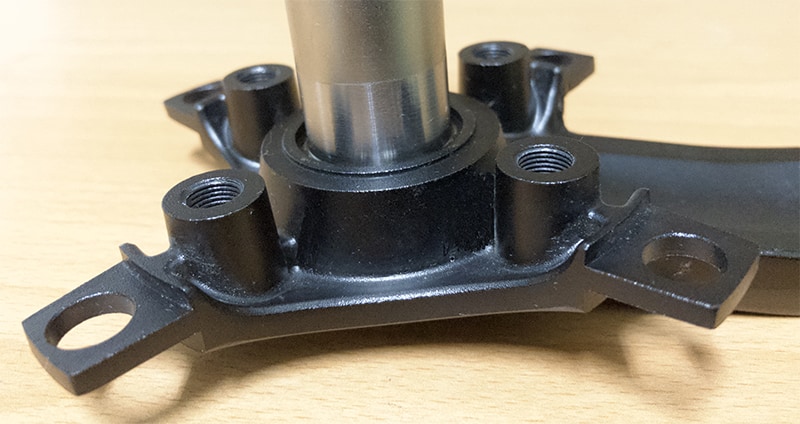
Crafting the angles and distances takes complex engineering and several CNC machining sessions (we’ll cover MTB crankset production below).
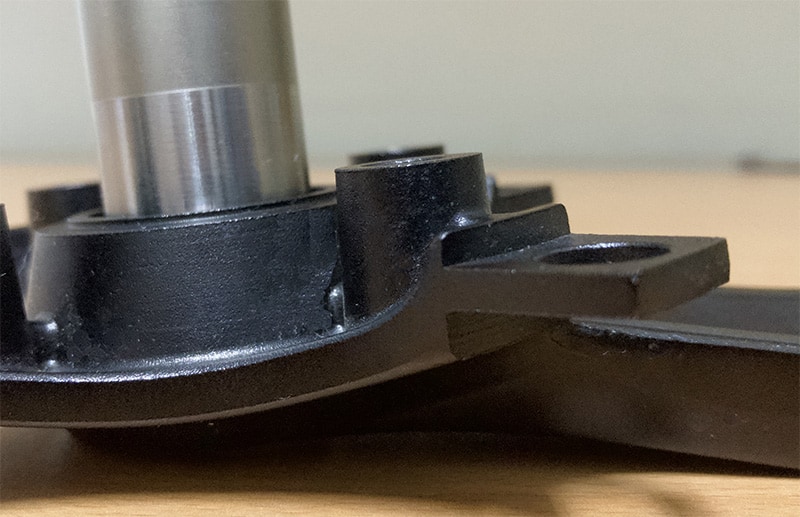
The distance between the granny ring mount (top third, center) and the middle/large chainring mount (right third, center) is calculated down to 0.001mm. Accuracy is crucial, otherwise shifting will be inconsistent and unreliable.
Mounting Each Chainring
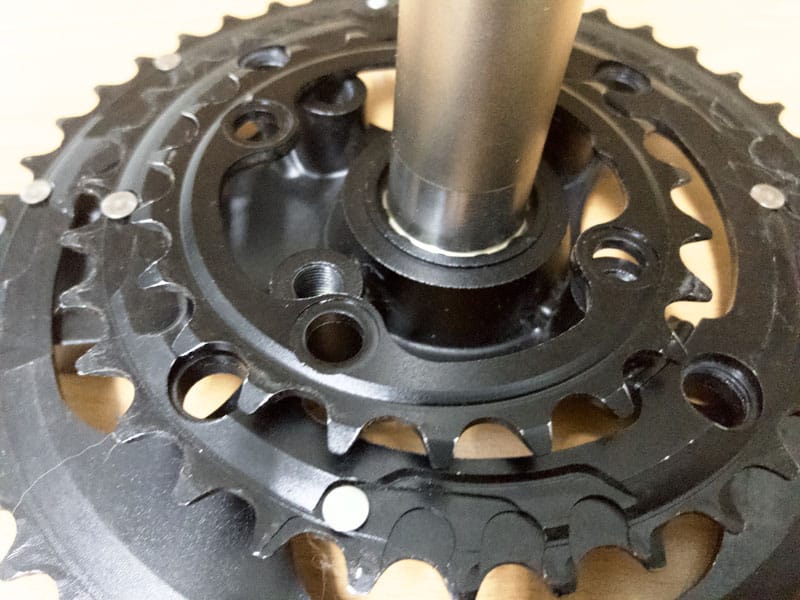
The large chainring is sitting below the mounting bracket; the middle chainring is sitting a little to the side on top. The large chainring slots into to the bracket’s lower edge; the middle ring on top.
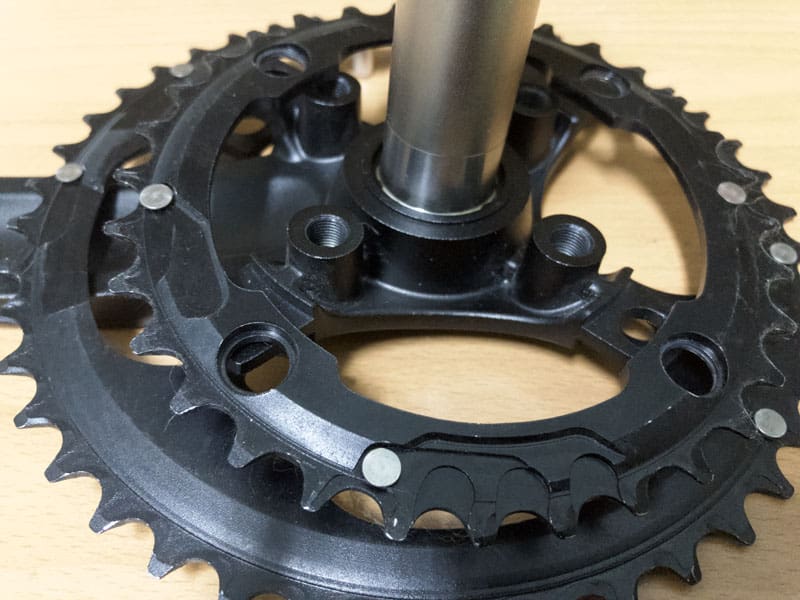
That’s the aligned position, giving you a view of the granny ring’s bolt holes, which line up between the middle of the crank spindle (imaginary point) and the middle/large chainring hole.

Add the granny ring at the “top” ie. the innermost mount.
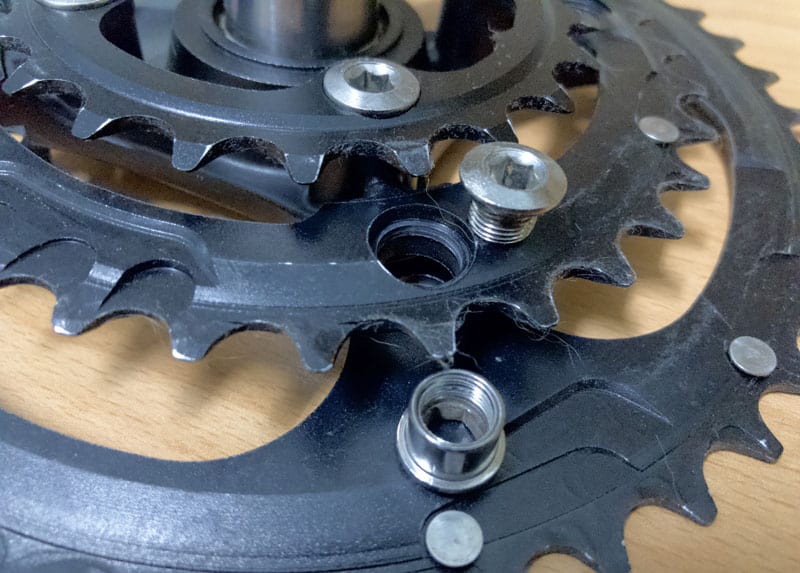
The nut slides in from the outside. The bolt, from the inside. Bolting the granny ring in position first, before the middle/large chainrings, works, although you can just as easily put it together in reverse order.
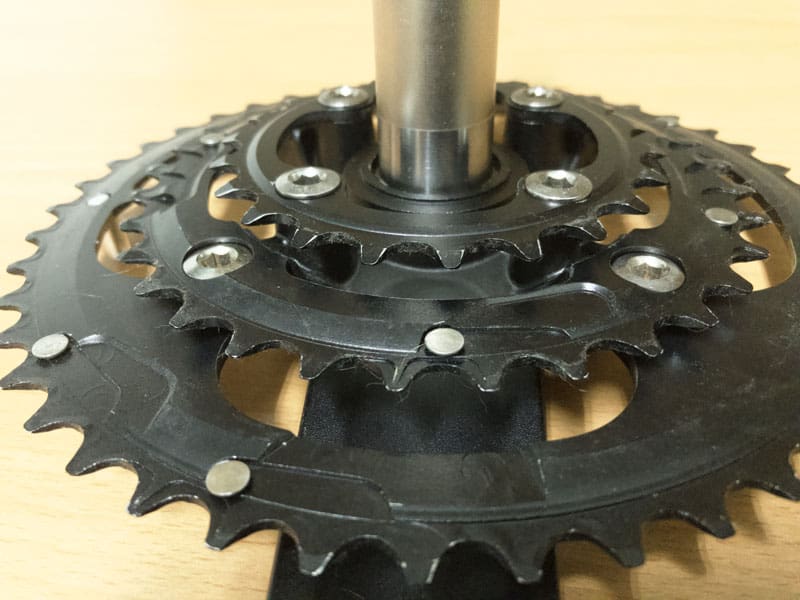
The way is clear to fasten the bolts to torque.
Incidently, you can also see the boss and ramps to the right of each boss. These additions are crucial to efficient mtb crankset functioning by assisting chain movement from a lower chainring to a higher chainring. The chain catches on the boss, then the ramp, lifting into position.
Crank Minus Spider—Direct Mount Chainrings
The simplest—and most recent—way to fix chainrings to cranks is to go spiderless.
Check out our post on Direct Mount Chainrings for the complete discussion.
MTB CRANKSET DEVELOPMENT THROUGH TIME
MTB history is fairly well known—we’ve all come across Gary Fisher, or maybe even posed for a photo with him, at Sea Otter, or Interbike when it existed.
The thing to remember about bike component innovation and development is that most of whatever has been invented or envisaged (I’m thinking of all those patent diagrams of technology that never actually rolled off a production line) happened in the 1890s or the following decade.

Is this the first mountain bike? Vernon Blake on his1930 bike. At a glance, it certainly appears so.
Vernon’s bike consists of a simple double-diamond frame structure with wide tires. And is that a double chainring on the crank? There’s also what could be a derailleur shifting lever on the seat tube, just above the crank.
The bike’s cantilever brakes also marks it clearly in the MTB class. The handlebar’s semi-drop position would make for difficult handling though.
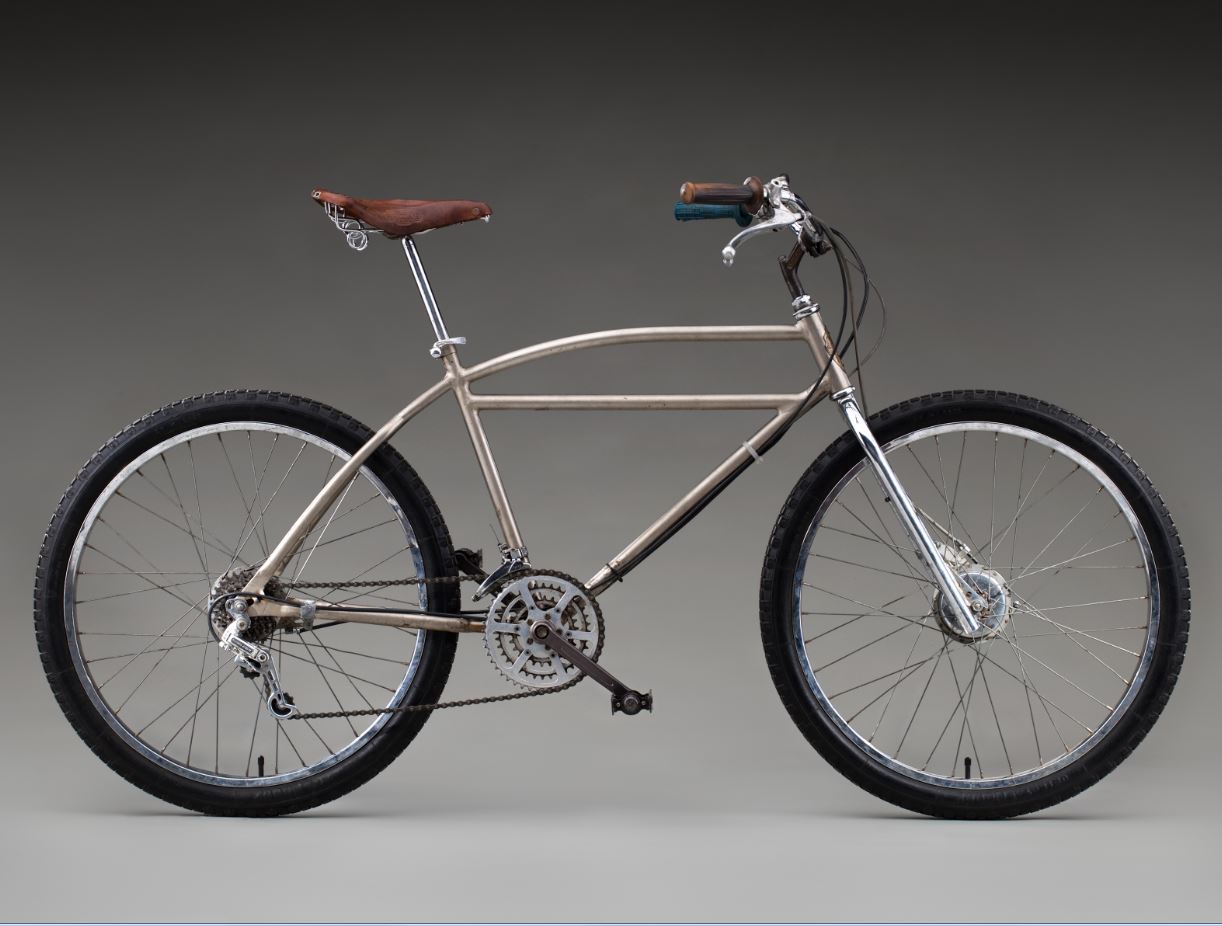
Compared with the original Klunker mountain bikes, the basic features are all there.
But while Vernon’s bike is a good candidate for an MTB, it still falls short. The important point to appreciate is that the historical context is completely different.
The early klunker MTBs were all about getting off-road onto the trails, away from traffic, away from the rules complicating everyday life. They were as much an expression pure freedom as much as a particular bike design.
The revolution resulting in 1x drivetrains is probably the biggest recent development in MTB cranksets.
What Was the Original Crank? Single Chainring Spider or Triple?
Original drivetrains had wide chainrings, by default, which narrowed over the years in response to narrowing chain link widths, which was, in turn, a response to continual addition of rear sprockets in the quest for optimum gear ratios.
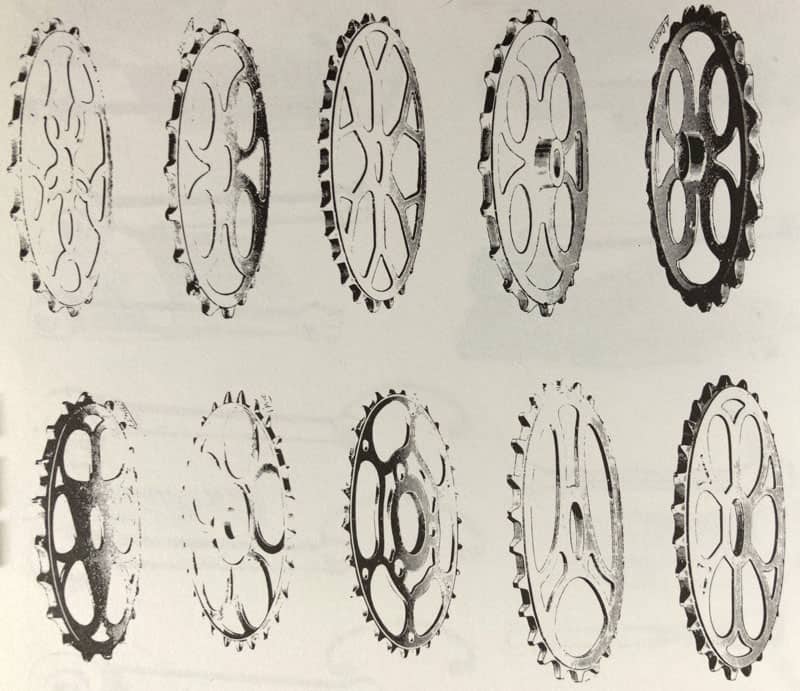
Here’s a selection of what was around in 1907 for example.
So, was it a simple progression from single crank to double then triple?
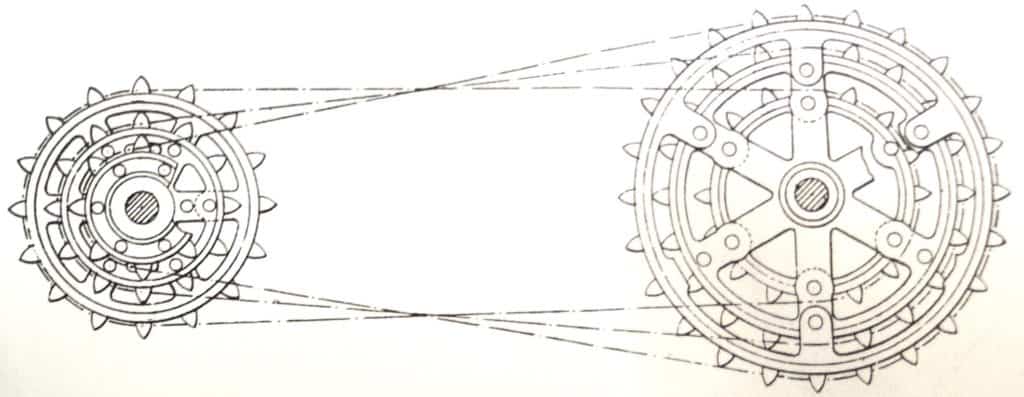
A Bernard Cabot design from 1893, the very dawn of the modern safety bike (safe, because of two equal-sized wheels rather than the head high ridiculously dangerous Penny Farthing designs).
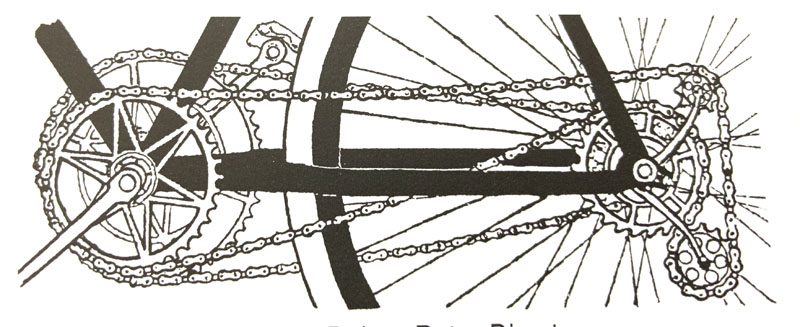
Here’s a sketch of an crank double from just a few years later. We can see that the quest for variable gearing spawned single, double and triple cranks from the get-go.
MTB Crankset Manufacturing
There are three key stages in creating an MTB crankset: cold forge, CNC machining, finishing. (The chain line is also important . . . more on that here.)
Cold Forge
While forge processing is the first step in the process, its probably not quite what you have in mind since this means of component production does not require heat. Hence the name “cold” forge.
We’d like to show you the complete forging process, even a little, carried out on a batch of MTB cranks.
Unfortunately, we outsource this to a small workshop specializing in cold forge techniques. They insist all their operations remain off the public record and top secret.
This situation is common in Taiwan where an old-school competitive advantage is seen to come from keeping manufacturing processes ‘secret’. “As soon as anyone else learns how we do it, they’ll do it themselves”, they say.
Many bigger companies have no problem with showing productive processes though; Chosen, the hub-maker for example. The example highlights hubs, not cranks, but the process is similar.
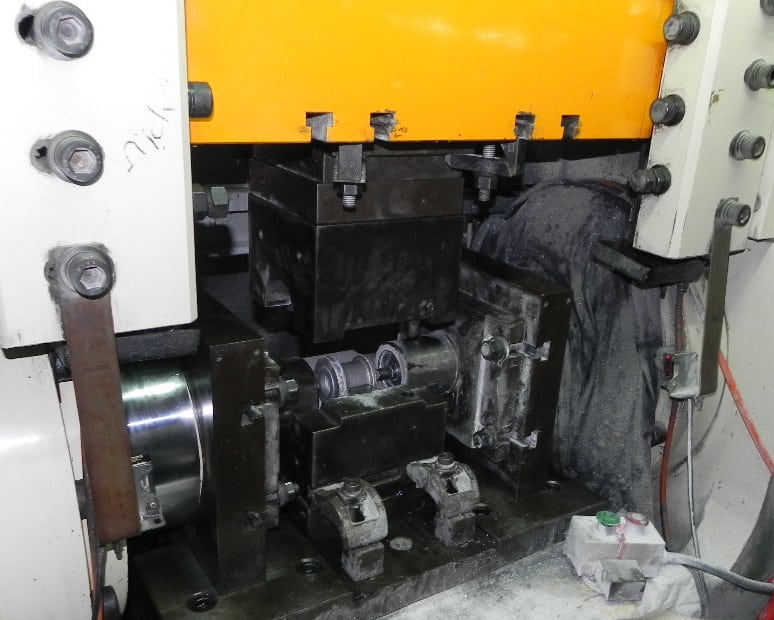
Cold forging involves mounting a jig or mold cut to the shape and dimensions of the component into a cold forge press. A component is pressed into existence in one movement taking a few seconds. Nothing to it really.
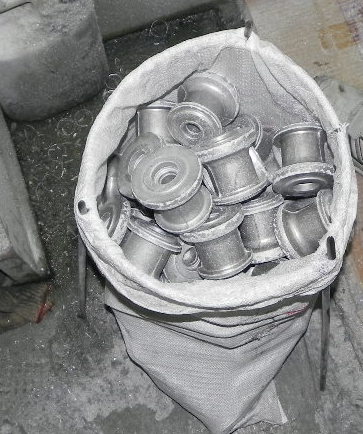
The extreme pressure shapes each aluminum blank into a form close to the finished wheel hub. Or a crank as the case may be.
Once we have the rough result, we still need to do more refinement as well as adding further functionality. We complete those through CNC processing.
CNC Machining
CNC machining makes it possible for a brand to create almost any component design imaginable.
A combination of cold forge and CNC processing is the most efficient way to produce parts, in most cases.
Manufacturers could make parts only using CNC. But CNC machining creates a lot of excess aluminum waste, and does take time. In creating MTB cranks we cold forge the shape, then refine and add to it through selective CNC machining.
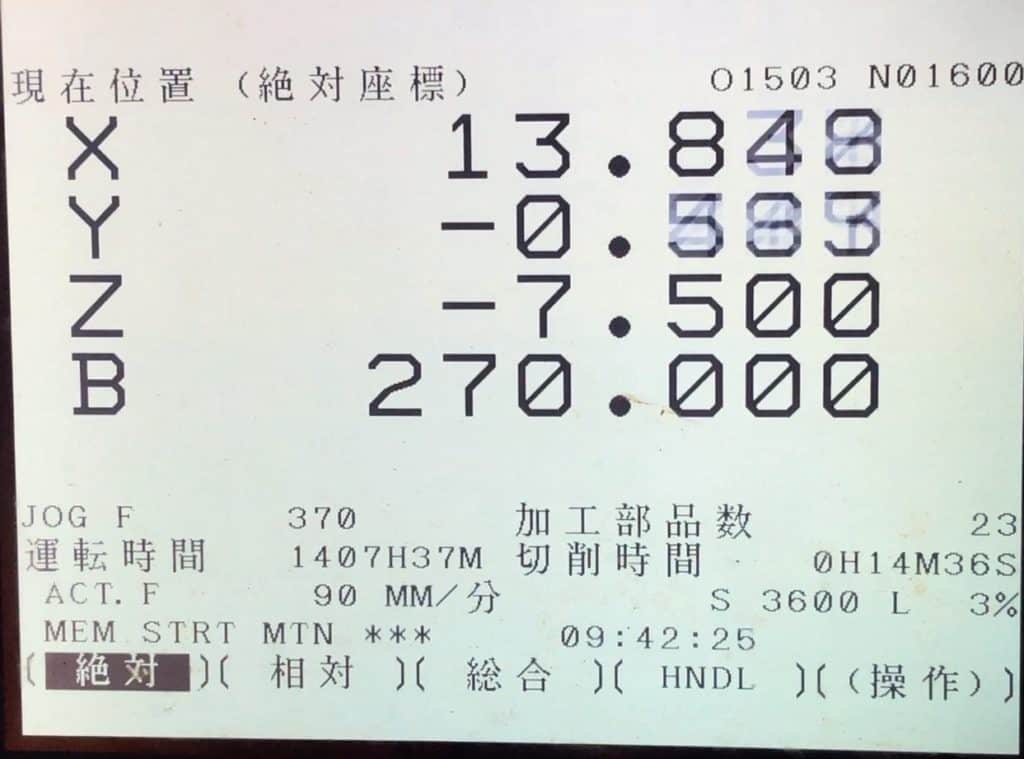
The program is written to the 2D X and Y axes. The third dimension is added with the Z value, which orients a cutter head on the vertical plane.
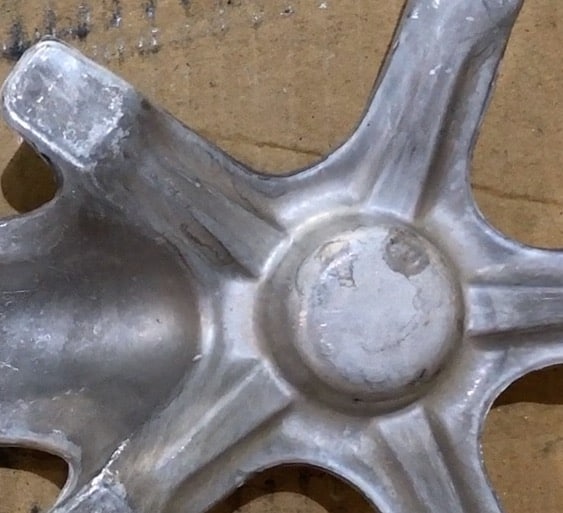
A raw-forged piece appears in the basic form of the finished piece.
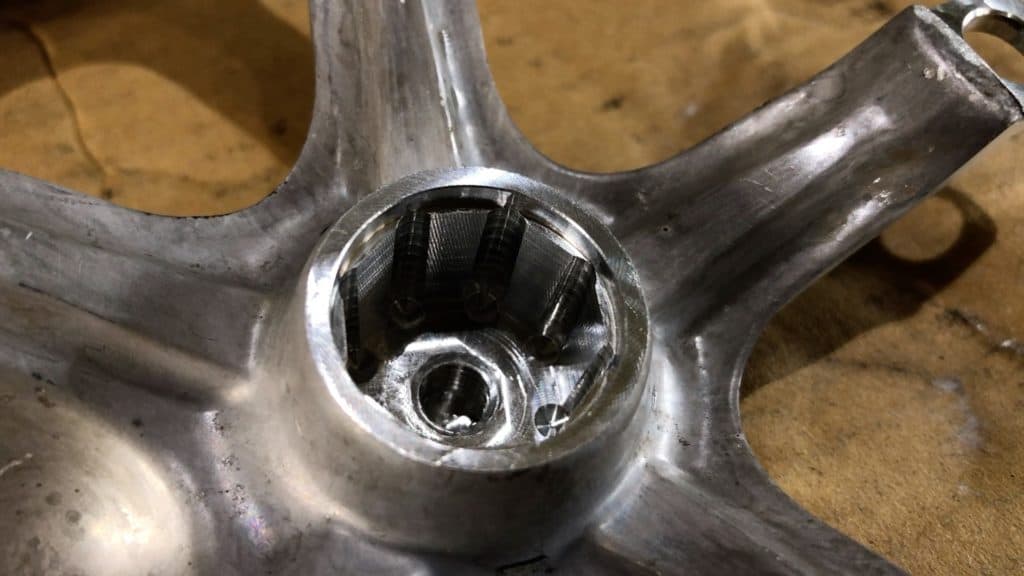
We’ll firstly machine the center: that’s what we’re aiming for. Then we’ll do the the spider arms.
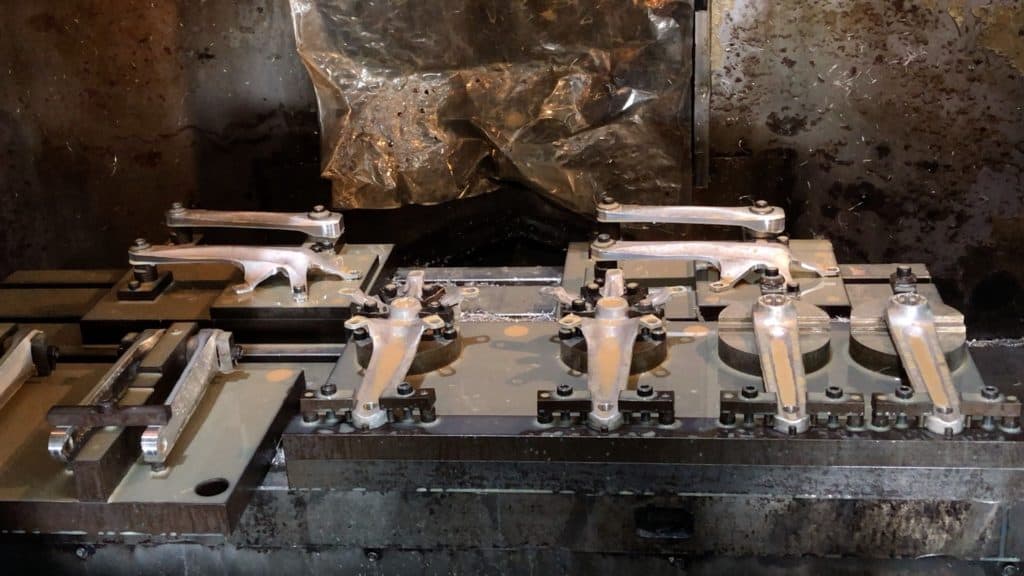
A range of cranks fixed onto platforms inside the CNC cabinet ready for processing.
One session completes a sequence of cuts of different depths at various points. As you’ll see in the image, both drive and non-drive cranks are processed together. All sorts of disparate machining can be done at the same time.
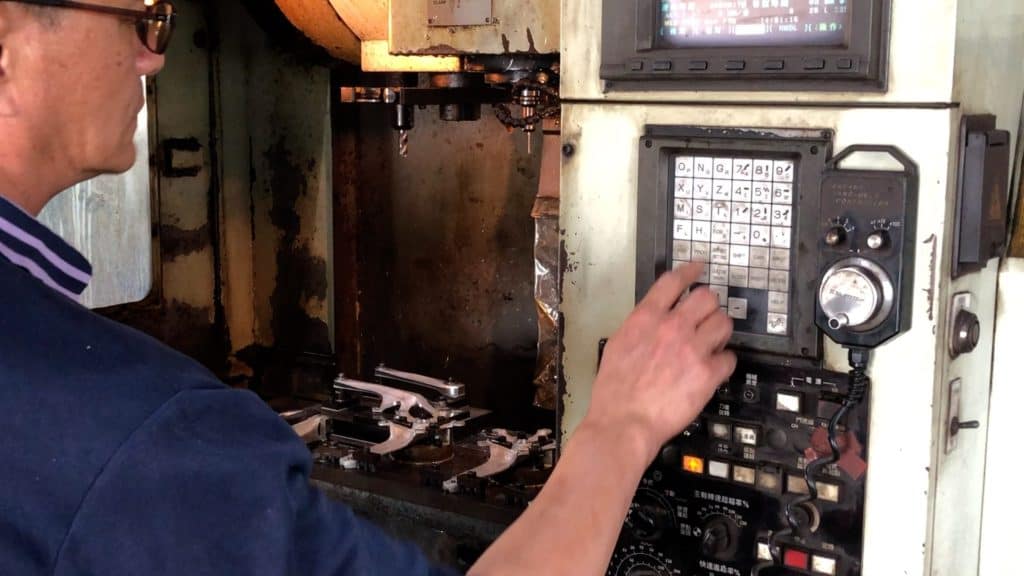
The CNC program is loaded; the operator makes sure there are no errors, making a few adjustments along the way.
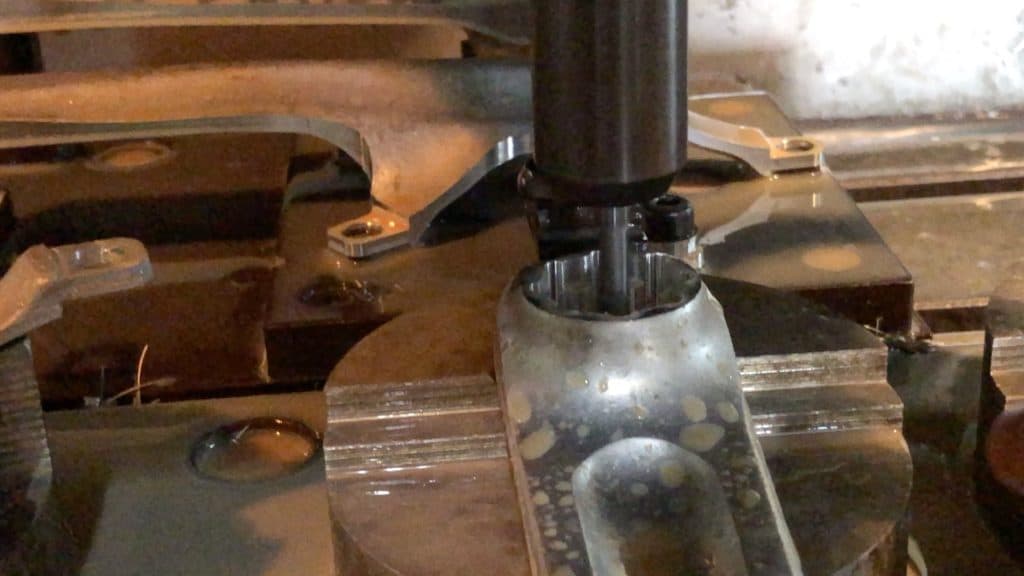
CNC’s cutting drill bits are the fastest, most precise means to cut complex shapes with pinpoint accuracy. The non-drive side crank here must be cut exactly to the contours of the spindle.
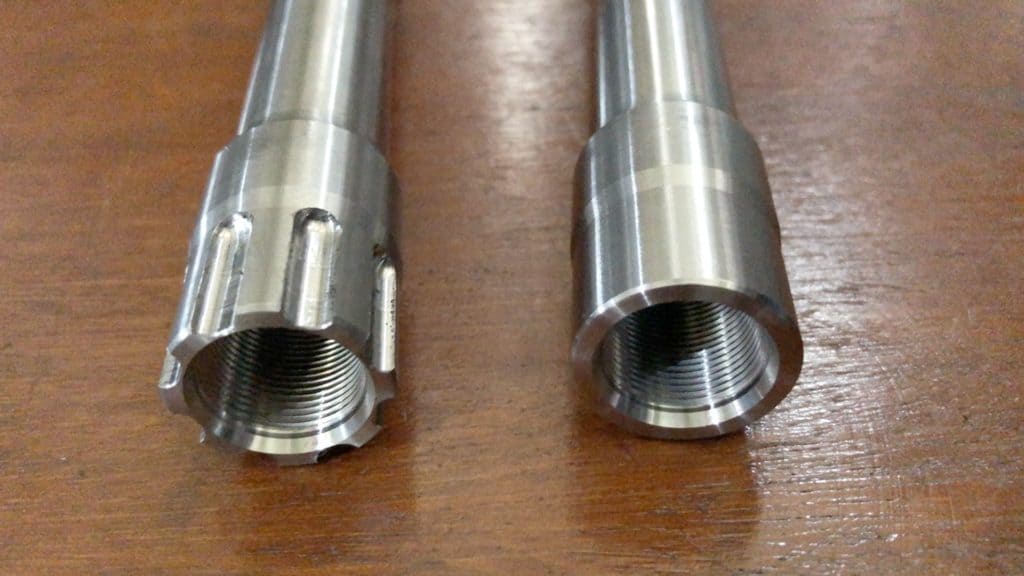
Machining the spindle takes place in a separate batch. Splines are cut into the semi-processed spindle on the right.
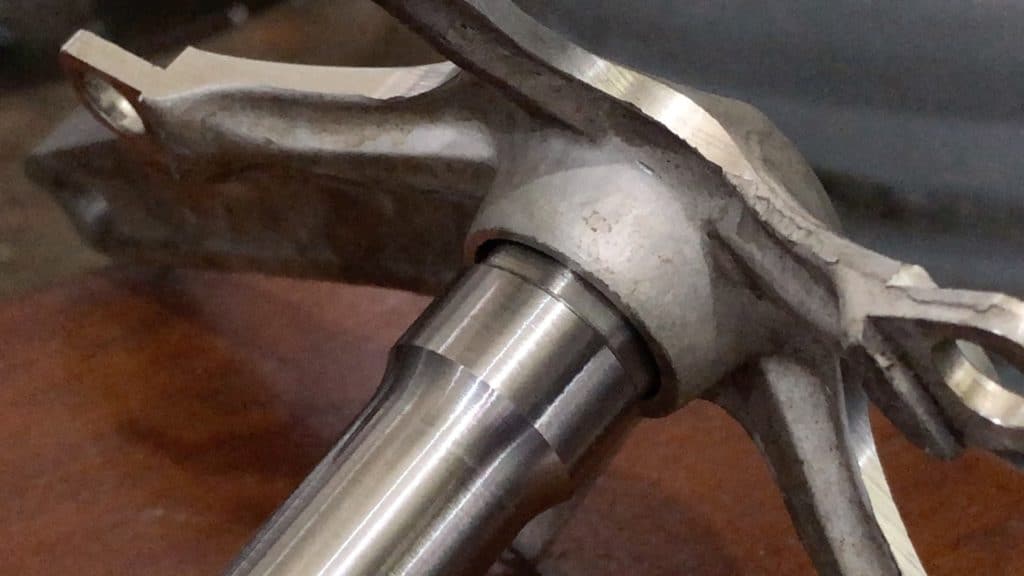
An exact fit. No play at all. A later process fuses the spindle to the spider.
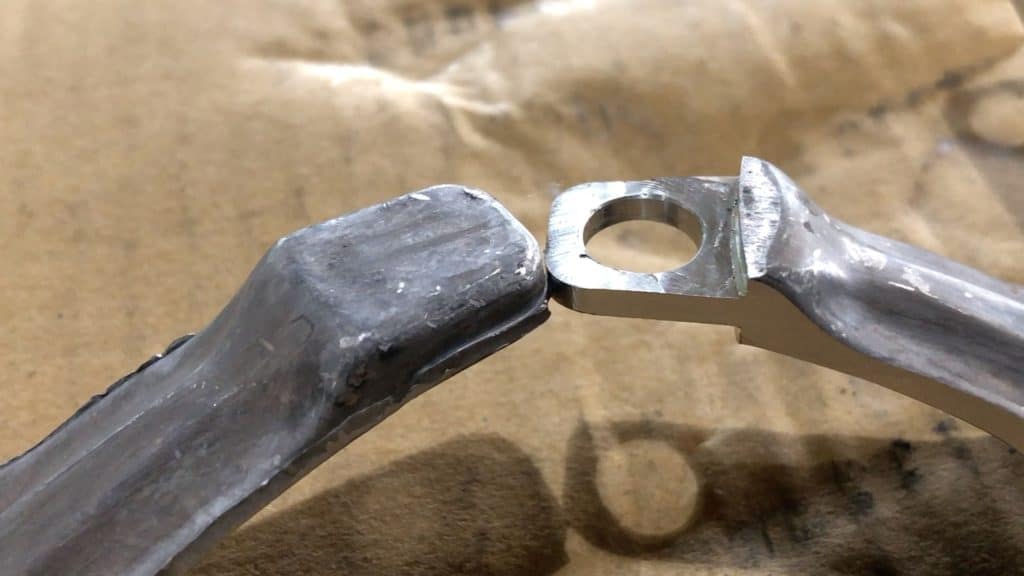
The raw-forged spider arm is on the left. The CNC cutter prepares the mount, then goes on to trim the arm’s edges. Once a piece has been machined, you’d never know it had been forged originally.
Finishing
The machined cranks next visit a sand-blasting and anodizing expert. The crank surfaces are blasted clean and prepared for immersion into the special solution in which. More details on anodizing in the bike-crank-arm post.
WHAT IS THE BEST CRANKSET FOR A MOUNTAIN BIKE?
“Best” is always relative. Best depends on:
- are you into downhill?
- perhaps entry-level bike path cruising is your goal?
- what about an eMTB? (see the next section)
For most purposes these days, you’ll best opt for a single chainring crankset fitted with a narrow-wide chainring which radically simplifies your drive train through eliminating the derailleur along with its shifter.
The narrow-wide chainring together with a chain guide virtually guarantees no chain drops issues. You’d also be wise to choose a wide range cassette, something along the lines of 11-36 is one to start with.
THE eMTB IMPACT on MTB CRANKSETS
The standardization of single chainring cranks in contemporary mountain biking has coincided with the acceptance and rapid evolution of eMTBs constructed around mid-drive electric motor systems.
Your bottom bracket completely disappears on an eMTB, and your cranks are only superficially relevant. Weight is now no longer
Here’s Ali Clarkson and Danny Macaskill getting an absolute blast out of a pair of Danny’s eMTBs on some pretty sketchy, steep, and loose downhill trails.
“This is insane. It’s uncanny,” says Ali as he and Danny power up the back of the descent to the top, passing other riders laboring without electric assist. “I’m still working for it,” he clarifies, letting us know that an eMTB is not a cop out. “Just going faster.”
Yes, the pedelec is no free, or easy, ride. Electric simply assist allows Ali and Danny to do the route many more times during the day than would be possible without assistance.
You’ve got at least three levels of assist available on mid-drive pedal assists. Using the lowest, or eco mode, is going to give you the toughest workout.
ARE CARBON CRANKS WORTH IT?
The answer to this question is completely subjective, and depends on what you believe is good value for money.
If you have allowed yourself a generous budget, you probably won’t think twice about the purchase.
However, the only argument for installing carbon cranks is for weight savings. But the weight difference between an anodized aluminum alloy crank and a carbon model will not give you any real advantage whatsoever.
Anodized alloy cranks are also more durable. The anodized finish is hard as porcelain. Not so with the clear coat finish applied to carbon epoxy composite components. The surface scuffs and scratches easily—they’ll look shabby and tatty sooner than later.
One reason to go for carbon cranks is the appearance of course. They just look more cool and hi-tech. But you may have a difficult time keeping them
FINAL REMARKS
MTB cranksets have evolved into a class of their own over the years.
One of the commenters in the Ali Clarkson/Danny Macaskill video embedded above declared that in five or so years, eMTBs will basically take over. Prices must reduce a lot for that to happen, which we’ll see within that time frame.
Should prices drop far enough, quick enough, then it will come to pass. We’ll no longer be talking about MTB cranksets; all discussions will be about mid-drive motors, with some peripheral discussion about the crank arms and the single chainring, which likely won’t be anything special.
